|
This page will be all about completing surveys, both from the main application and mobile. |
Pre-requisites
•Device token enabled for both cleaning and survey modules
The user has two options for completing a survey. The first option is to complete a survey on it's own. This can be done either by selecting it from the survey view on mobile or the survey information view in the main application. The second option is to complete the survey as part of a cleaning audit.
Below is a guide for the user to do both split into two main sections:
•Completing a survey audit via the mobile application
•Completing a survey from the Survey Information View
To start completing a stand alone survey, the user can use one of two views: mobile survey view and survey information view in the main application.
Typically, most users will use the mobile application to complete the surveys, so we will start by using that view.
Completing a survey audit via the mobile application
Start by logging into your mobile application. For details on how to login, please see our login guide. Once logged in, select the survey mobile link.
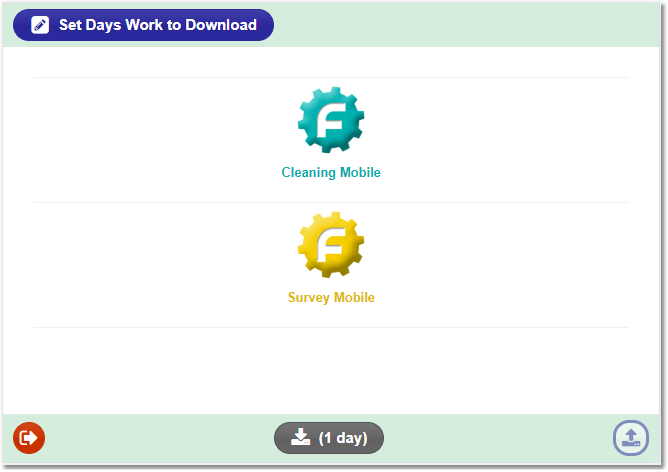
Survey mobile link
Once logged in, the download process will start. This will retrieve all of the surveys that are allocated to the logged-in user, with a Survey Date less than or equal to the current date.
The user can set the number of work days to download e.g. on a Monday morning (e.g. 23/03/2020), if the user would like to download all surveys for that week, the user can set the download days to 7. This means setting the download date to 7 Days where the first day is 23/03/2020 and end date of 29/03/2020.
This will retrieve all surveys that have an Survey Date of less than or equal to 29/03/2020.
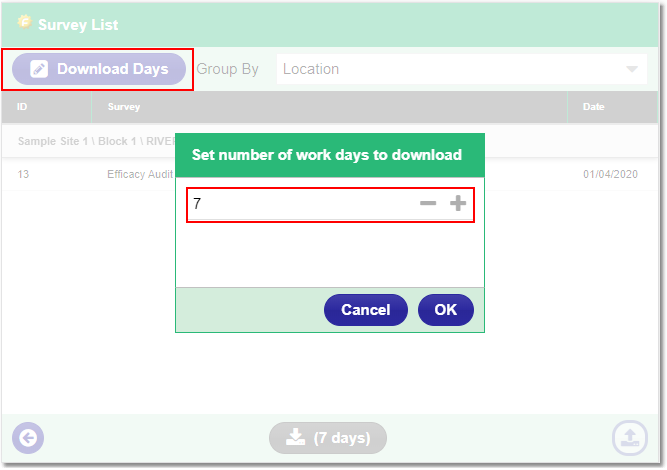
Set download days button
Click the [ OK ] button to apply the changes. This should update the download button and set the display to [ download-icon (7 Days) ]:
Download button
Click on the [ download-icon (7 Days) ] button to start downloading the surveys.
The Survey List will display the downloaded surveys allocated to the logged-in user. Surveys are grouped in the list by location, allowing the user to easily view how many surveys they have for each location. For example:
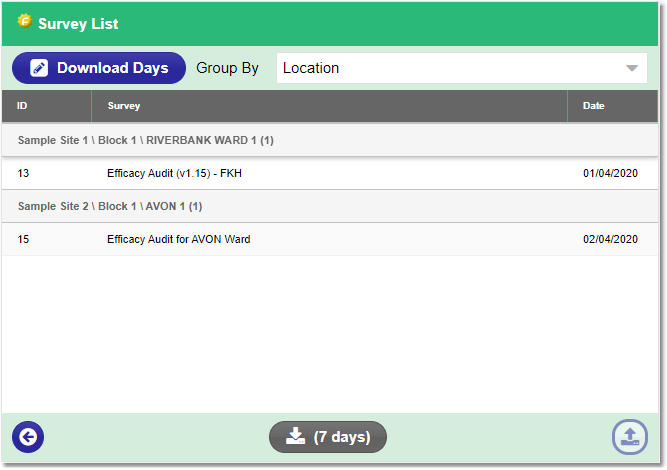
Survey List
Column |
Description |
ID |
Unique survey ID. |
Survey |
The surveys title. |
Date |
The surveys date. |
The user can select a survey to complete by selecting the desired Survey's row.
The user can then begin completing the survey, starting with selecting a scorecard from the navigation bar on the left of the screen. This will allow the user to then select the first grid.
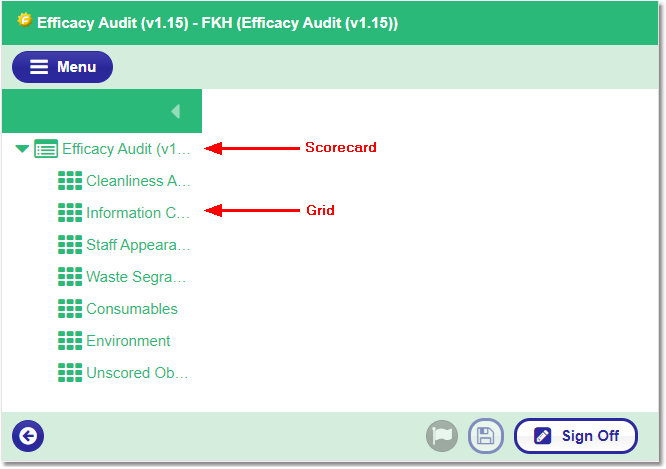
Once in the grid, the user can complete each question in the survey.
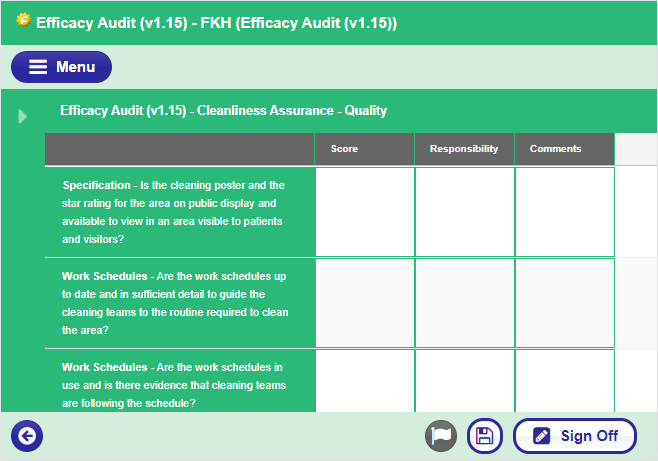
To enter an answer, tap/click on the relevant answer field. This will display a pop-up window where the user can enter the answer.
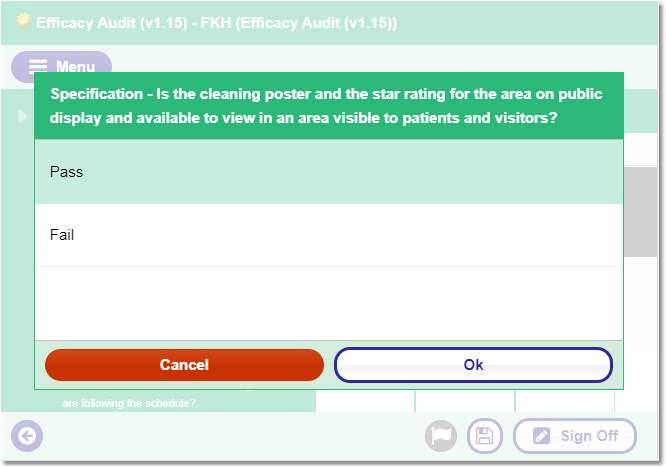
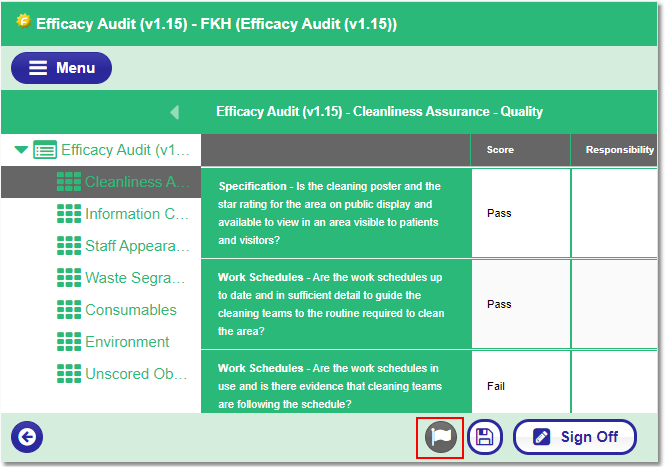
Repeating this process, the user will be able to complete the entire survey.
Clicking the flag icon will validate the scorecard and will highlight grids with missing values:
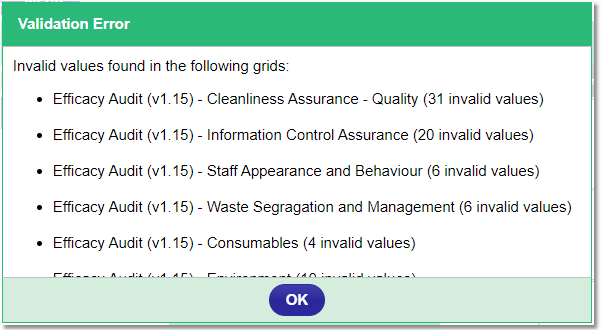
If "Signed Off Required" is set to "No" on the template, the user would see a [ Save & Commit ] button at the bottom of the screen.
Clicking the [ Save & Commit ] button will save all the changes and commit the survey when uploaded back to the main application.
If "Signed Off Required" is set to "Yes" on the template, the user would see a [ Sign Off ] button at the bottom of the view.
Clicking the [ Sign Off ] button will display the Sign Off Panel where users can add notes and signatures of the Staff / Assessor who completed the survey.
Completing a survey from the survey information view
The second way a survey can be completed by the user is via the Menu > Survey > Survey Information view.
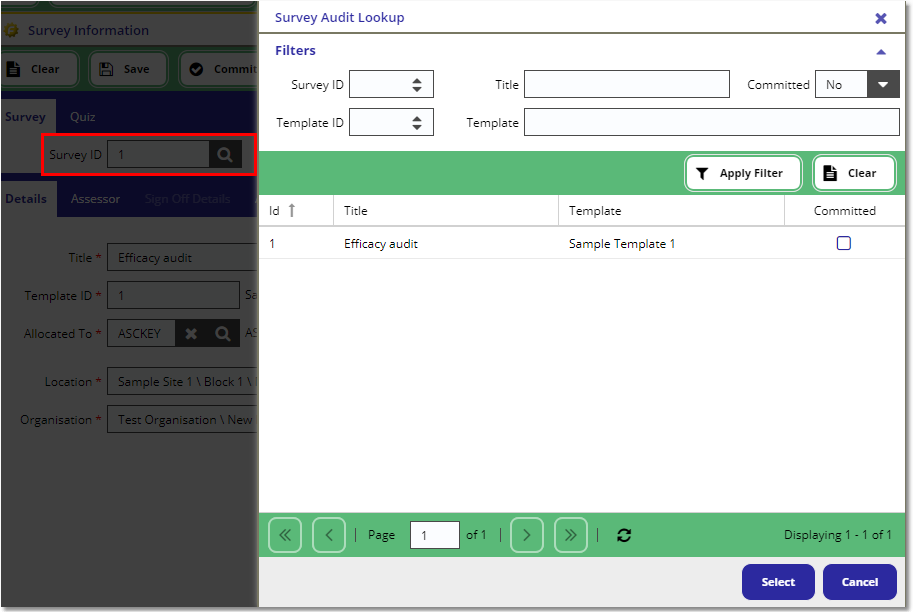
Find the survey audit by clicking on the search icon on the Survey ID field. This should open the Survey Lookup window:
Once a survey is loaded, the user can navigate to each scorecard tab and complete the answers of the survey.
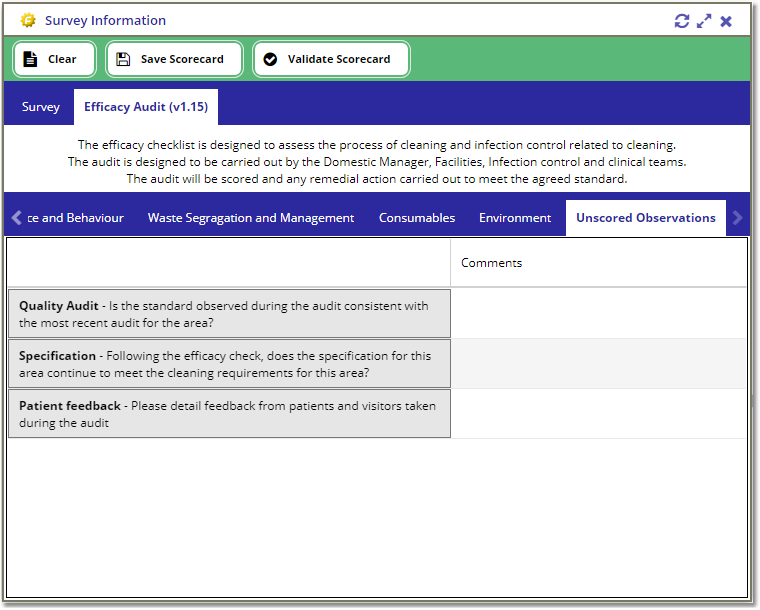
The user can then click on the [ Validate Scorecard ] button to validate the scorecard and highlight where an answer is missing.
Please note that the [ Validate Scorecard ] button will only find missing answers for cells with a "Select" Entry Type.
Once all the scorecards are saved and validated, navigate back to the Survey tab, complete the rest of the required information and click on the [ Commit ] button from the top toolbar.
This should commit the assessment and display the survey score in front of the view:
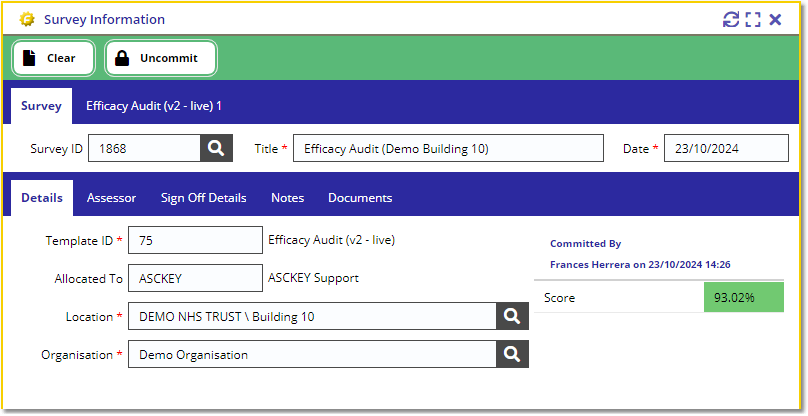
Once committed, the survey becomes read-only for all users.
