|
This page will be all about setting up the advanced options required to create & manage a task ticket. We will go through creating the ticket priority, task types, event codes, and mobile ticket list display. |
Each of the advanced options play a part in creating and managing a ticket record.
Before you start using, they system, you will need to have created at least the ‘Priority’ and ‘Task types’ before the system will operate effectively. The other options are non-mandatory items but will allow for extra features to be enabled in the system.
•How to create survey links (e.g. Health & Safety Checks, Assessments, and Element list)
•How to create different task types and task type fields
•How to create different on-hold / closed event codes
•How to configure the ticket list display
•How to create room inspection items
Before you begin, you will require access to the Task Administration / Task Advanced Options view along with the Create permission on the view.
Go to the Task Administration / Task Advanced Options view and navigate to the Priority tab.
Give each priority you are adding a description. If you would like the mobile system to display a colouring of the priority set on each job, apply the colouring here and then set the SLA times.
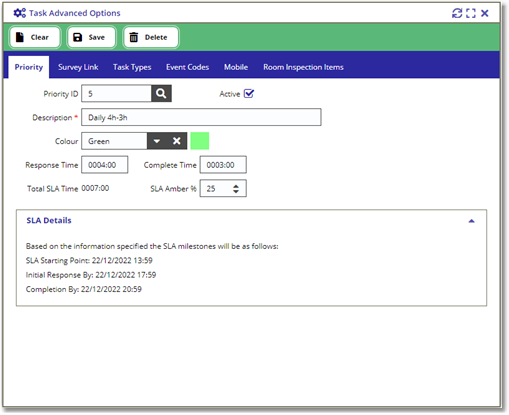
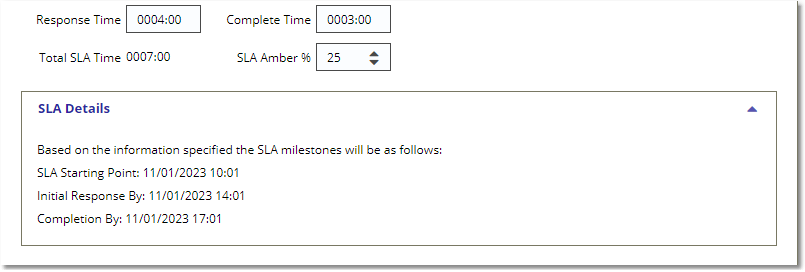
Each priority has a two stage SLA set against it: Response and Complete.
The Response Time is calculated based on the time the ticket is created to the first work in progress event.
The Complete Time is from creation to the job being completed.
The SLA Amber % is a percentage of the Response Time, 0-25, which when triggered will cause the task to display amber on the ticket list to show you may potentially miss your SLA if no action is taken soon.
How to create survey links (e.g. Health & Safety Checks, Assessments, and Element list)
The Task Administration / Task Advanced options / Survey Link tab will require you to have access to or already have created Survey Answers from the Survey module.
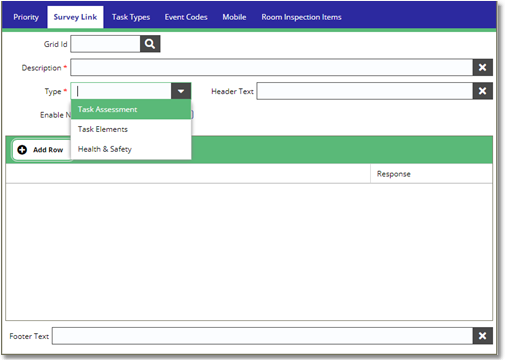
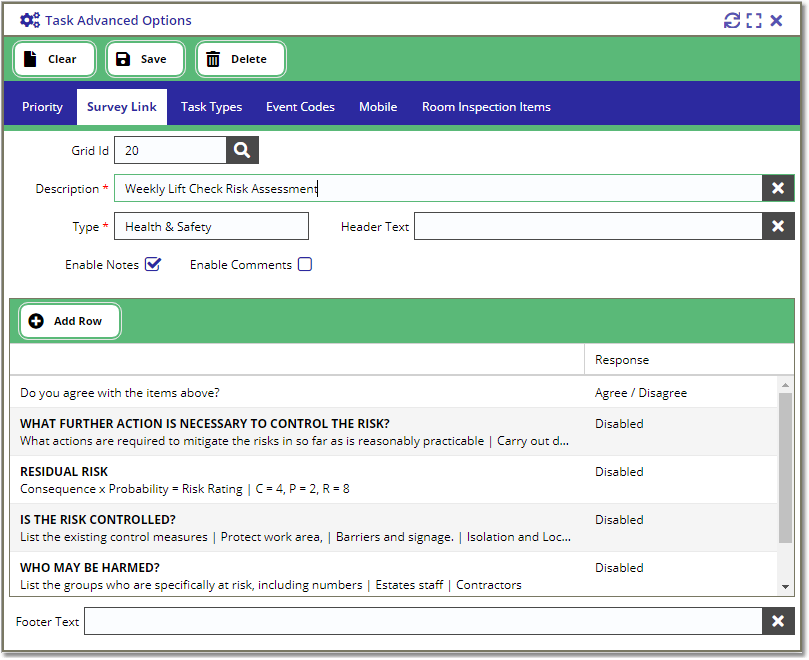
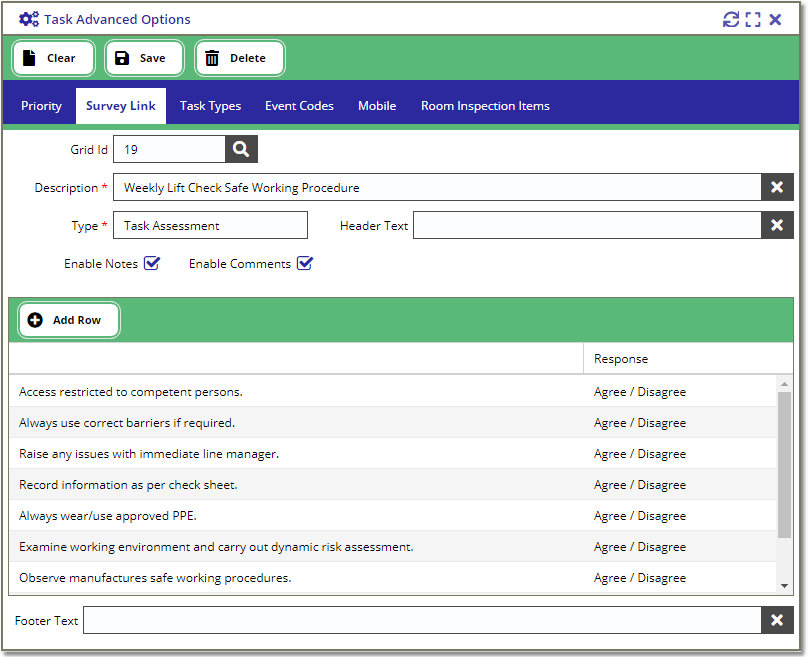
There are 3 types of links that can be created and link into the Task system; Assessments, Elements, and Health and Safety.
Task Assessment and Health & Safety (H&S) links are required to be responded to before the staff are able to successfully log onto a ticket.
The difference between the two being that an Assessment only needs to respond to once whereas the H&S will need completing each time you log on to the job.
Elements are the systems way of creating a list of checks within a ticket that’s staff have to respond to complete the work required, this list could be simple done/not done responses or a collection of a reading or a measurement that can be used to determine whether filters, for example, need changing or not.
To set up a survey, first decide which type is required, then add your description.
Click ‘Add row’ to activate the grid and type in the first line followed by the type of response you require. (These responses will be based on the Survey Answers)
Examples of all 3 are set out below:
Health & Safety
Task Assessment
Task Elements
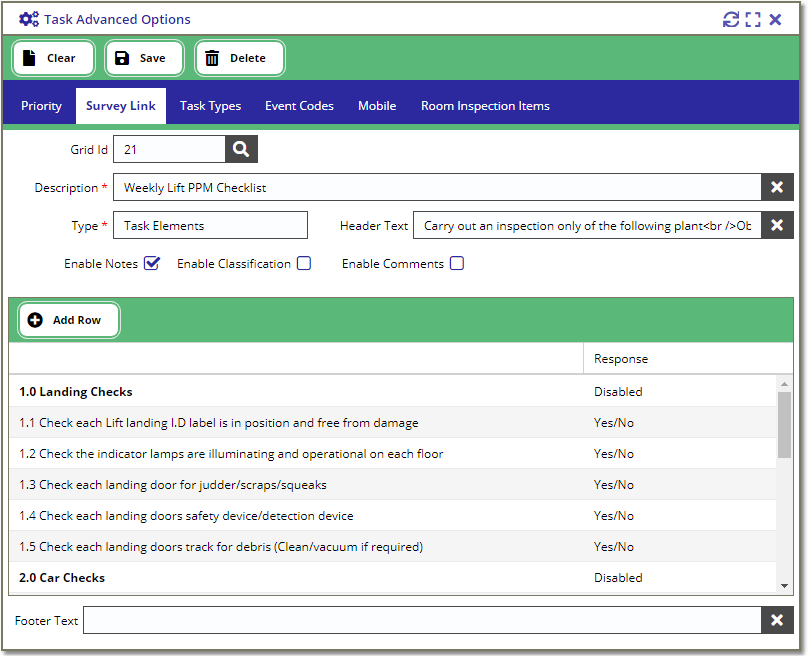
The Elements type has the added option of being able to set the ‘classification’ of the work. The Ticket Classification works as follows:
- If there are no elements against the ticket, then it will copy the Default Classification from the template frequency.
- if there are elements against the ticket and classification is disabled on the survey grid, then it will copy the Default Classification from the template frequency.
- If there are elements against the ticket and classification is enabled on the survey grid, then it will take the HIGHEST classification from ALL the elements combined.
Classifications:
1 - No Classification
2 - Discretionary Task
3 - Function Critical Task
4 - Mandatory Task
5 - Statutory Task
For example:
If there are 10 elements against the ticket, 3 elements = No Classification, 5 = Mandatory Task, and 1 = Statutory Task. The Ticket Classification will be set to 'Statutory Task' because it is the highest classification.
How to create different task types and task type fields
Each module in the system can have task types set up against it that can then be reported on via the Helpdesk.
The module can also be used to constrain the dataset a user can see in the system.
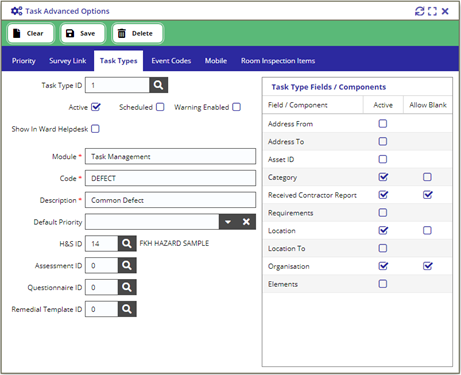
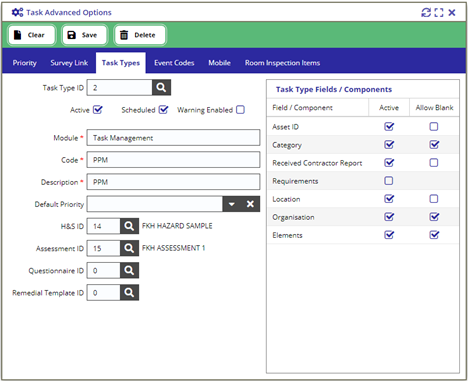
Users can define what fields are required for a task type, allowing for simple task types and more specific types to be created.
You can create both scheduled and non-scheduled task types. Warnings can be applied that alert you to multiple tasks being raised within a given period.
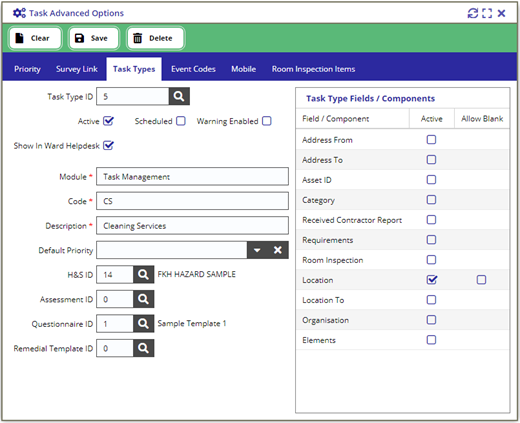
Task types can also be hidden from the Ward Helpdesk to avoid the incorrect task being used.
On creation of a task type, all the red asterisk fields must be populated. A default priority can be set if you wish, along with links to Health and Safety (H&S), Assessments, or post work Questionnaires.
You are also able to link a follow up task type if you want to split or distinguish between a first attempt and follow up tasks.
On saving the details, you will then be presented with a list of fields/components that can be applied to the task type.
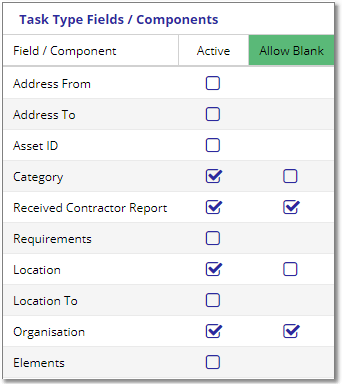
If the Allow Blank is ticked for the active field, applying this will allow the system to save the ticket being created without this field being populated.
|
In this example, the following fields are active for the selected task type:
Category, Received Contractor Report, Location, and Organisation.
The following fields are required:
Category, Location
and the following fields are optional:
Received Contractor Report, Organisation |
How to create different on-hold / closed event codes
Event codes are the stages a ticket progresses through from creation to being closed off. The system allows for custom event codes to be created for On-Hold events and Closed down events
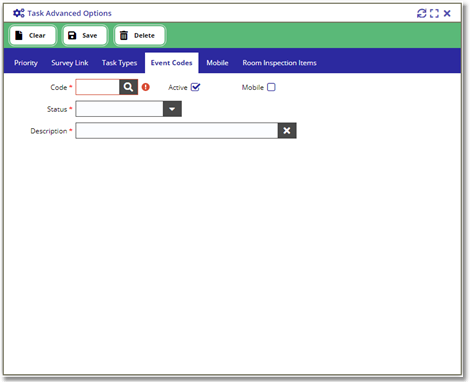
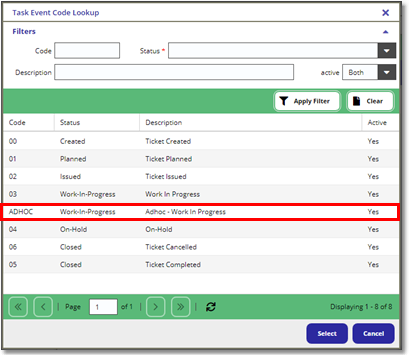
The code you use can either be numerical or a descriptive code, as show below with Adhoc.
Simply set eh code you wish to use, pick the relevant status and a long description. You can also indicate whether the new event code can be used by the mobile system.

How to configure the ticket list display
The configuration of what fields are viewable and how tickets are grouped can be set here for all user.
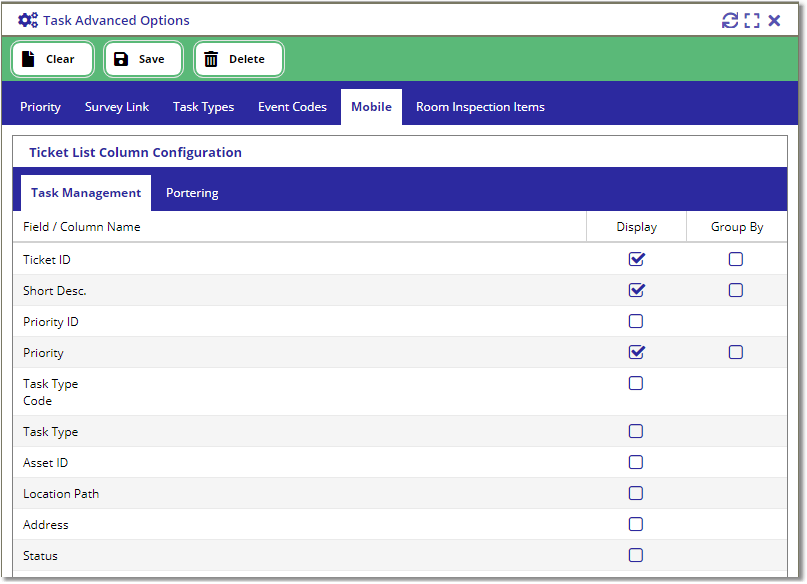
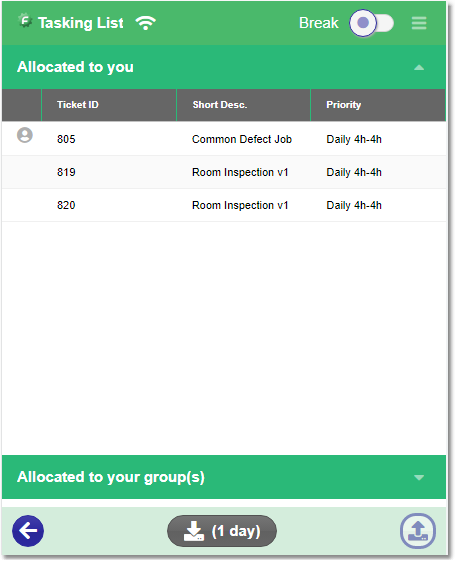
This is how it looks in the mobile application with the Ticket ID, Short Desc., and Priority as the display columns in the mobile Ticket List:
|
Please note, it is important to think about the size of your device before activating the fields / column.
|
How to create room inspection items
Room inspection items are only used by the Room Inspection task type.
When a Room Inspection ticket is created against a location / functional area, it brings in ALL the active rooms against the area and the user can then add items to check in the room.
Populate the Description field and press the Save button. This will give you a new Item ID and activate the bottom half of the tab:
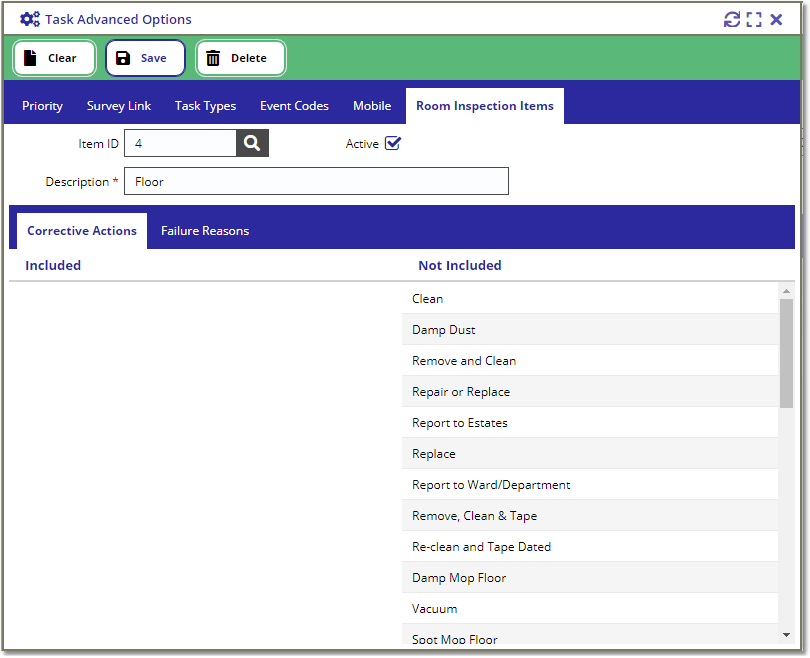
Each of the item added to the room can be marked with the following scores: No Issue, Issue Found, and Not Checked.
When the item is scored with Issue Found, the user must define a Failure Reason and a Corrective Action.
Hence, you must define on the bottom half of the tab which of the Failure Reasons & Corrective Actions are relevant for the room item.
(Failure Reason & Corrective Action options can be created from the Maintenance / Table Maintenance view)
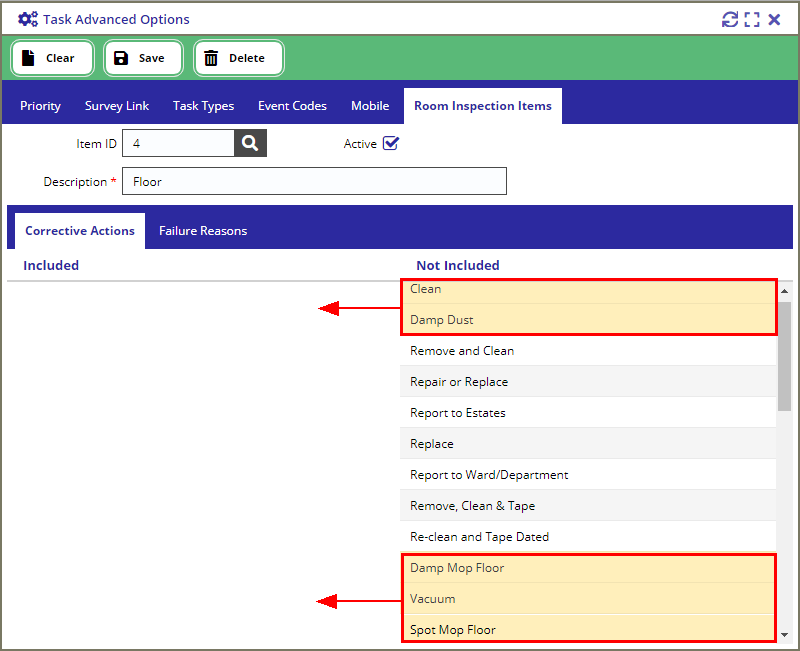
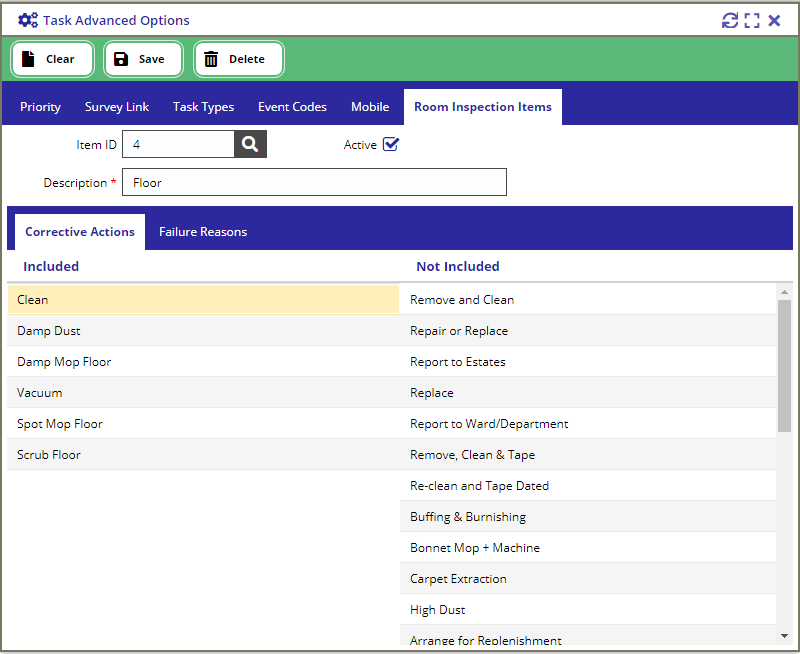
To add a Failure Reason / Corrective Action, select a list of items from the Not Included grid on the right. (You can multi-select multiple items by holding the Shift or Ctrl key from your keyboard)
The drag & drop the selected items within the Included grid on the left.
