|
This page will be all about ticket creation. We will go through how to create tickets from different parts of the system. |
Task tickets are the main component of the Task Management module.
Tickets are used to record jobs like the Asset - Planned Maintenance, Defect & Cleaning jobs, etc.
The users can add different types of events (e.g. Work-In-Progress event, On-Hold event, etc.) against the ticket. See the How to complete tickets guide to find out more.
There are a number of charts & reports in the system that will help you determine if a job is carried out within SLA.
Each of the view mentioned below will require you to have access to the component and a Create permission. See the Security Control - Assigning security permissions against the STAFF record guide to find out more.
•How to create a ticket from the main application Helpdesk view
•How to create a ticket from the Task Allocation view
•How to create a ticket from the Ward Helpdesk view
•How to create a ticket from the mobile application
Before you start, please make sure that you have created the following key items from the Task Advanced Options view: Task Type* & Priority*.
Note, you can only create tickets manually for a non-scheduled task type.
All the tickets with scheduled types are created automatically by our Planned-Task system that runs nightly.
How to create a ticket from the main application Helpdesk view
To create a ticket from the Helpdesk view, please follow the instructions below:
Go to Menu > Task Management > Task Helpdesk view.
You will see that the Status, Reported By, Telephone, Date/Time fields are automatically populated with your details & the current date & time.
The fields are editable and these values can be changed if required.
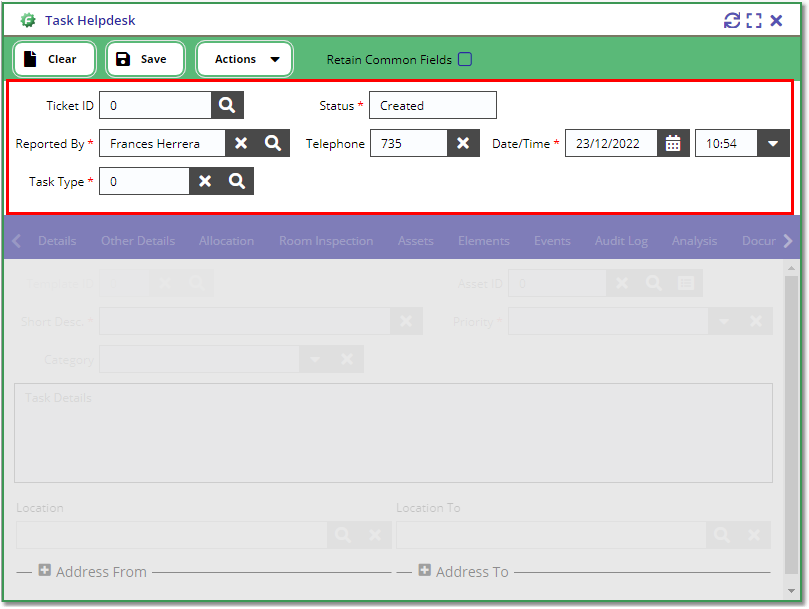
Select a Task Type from the Lookup field. This will then activate the bottom-half part of the view and display the fields that were configured against the Task Type.
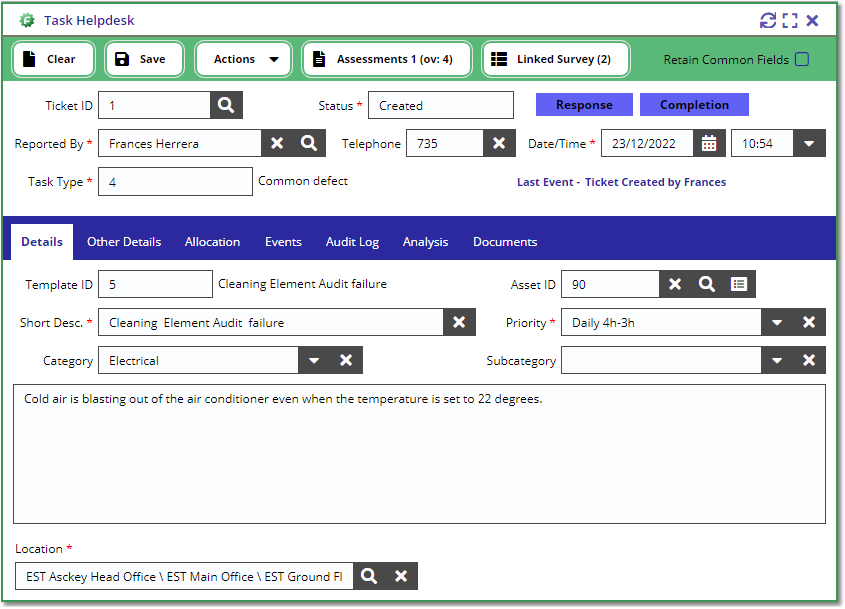
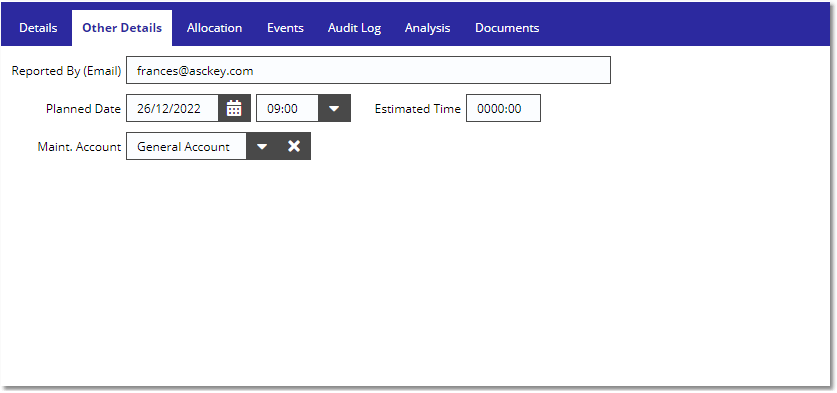
Populate the fields on the Details & Other Details form to complete the information on the ticket then press Save.
(Note, all the fields marked with red asterisk* are required)
You will be given a new ticket ID once the record is saved and you can use this to load the ticket information back on the Helpdesk view or use as reference when allocating jobs to the user.
How to create a ticket from the Task Allocation view
Note, tickets created from this view will get automatically allocated to the selected Staff on the list.
To create a ticket from the Task Allocation view, please follow the instructions below:
Go to Menu > Task Management > Task Allocation View and navigate to the Templates tab. You can select a Task Type if you want to filter the template list.
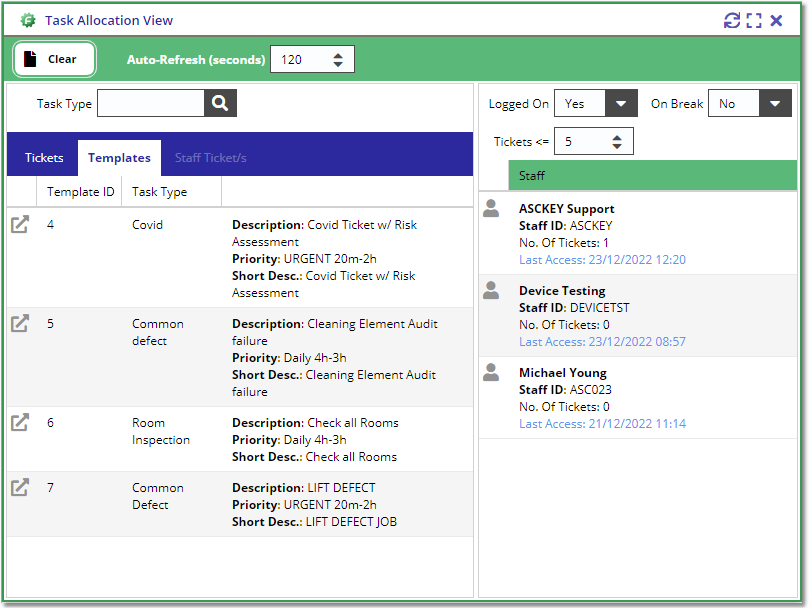
Select a Template from the left-hand grid by clicking it with your mouse pointer, then hold and drag & drop the template to the Staff record on the right grid.
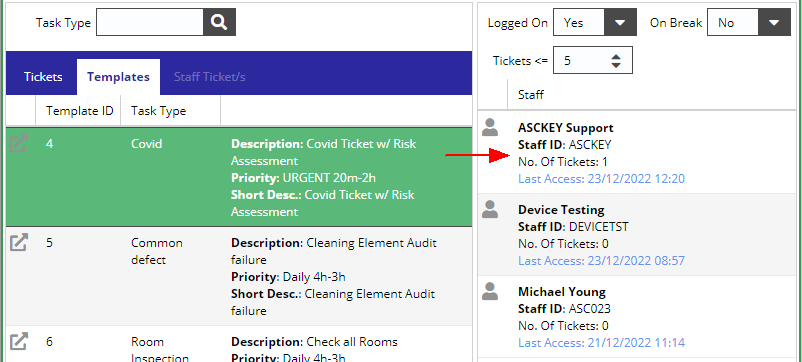
The action above will display the Create Ticket & Allocate window. The details in the form will be defaulted to the details in the Template.
The fields in the form are controlled by the selected template's Task Type. All fields marked with a red asterisk* are required.
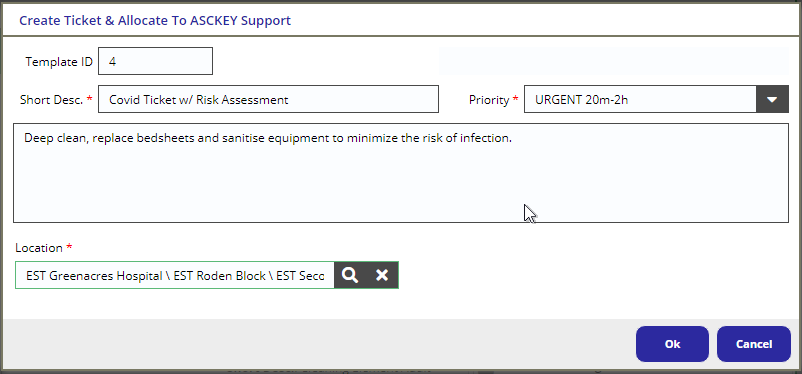
Once you have populated the form with all the ticket information, click on the Ok button to create & allocate the ticket to the selected staff.
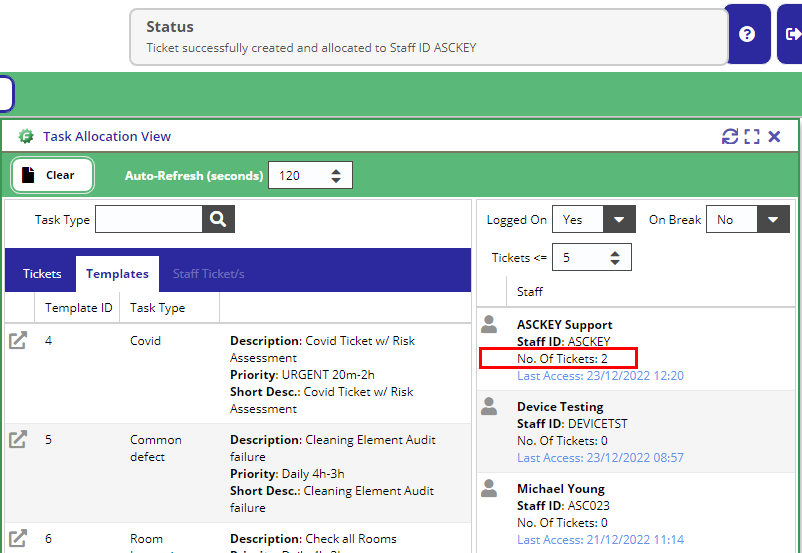
A 'drop-box' message will get displayed to confirm when the process is complete and you should see the "No. of Tickets" increase against the selected staff:
How to create a ticket from the Ward Helpdesk view
Login to the Ward Helpdesk app via the following URL:
Live |
|
Demo |
|
Beta |
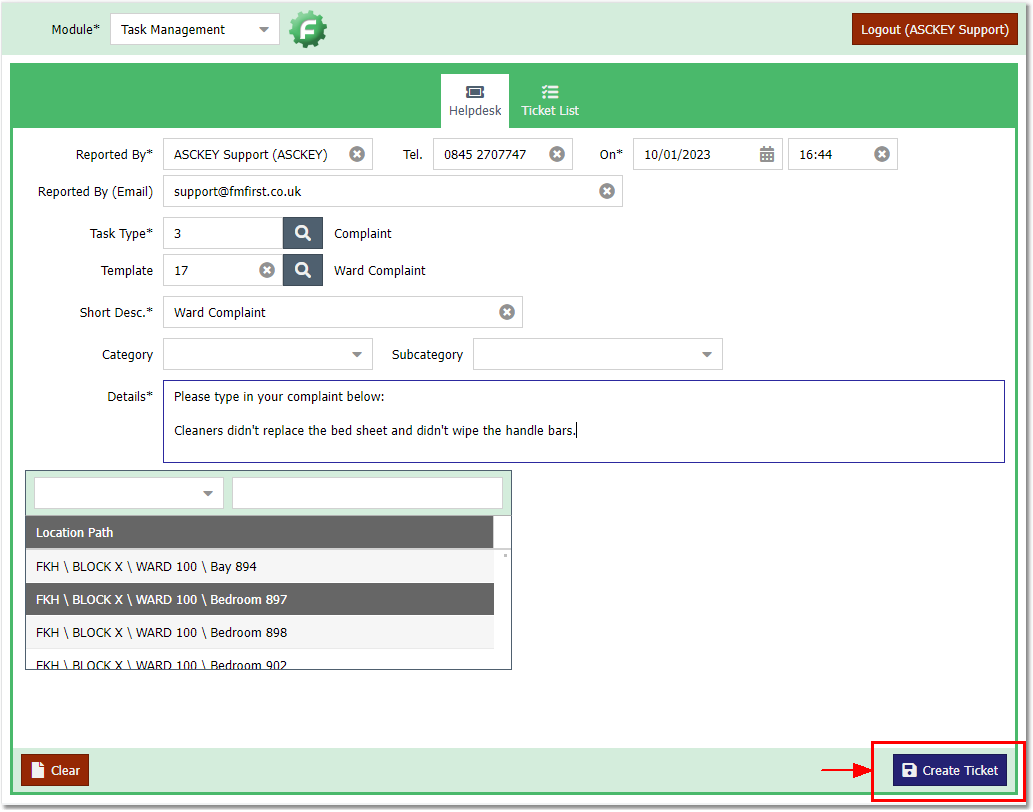
Once logged in, you will see the "Helpdesk" form pre-populated with your staff details.
Select a Task Type from the Lookup field. This will then activate the bottom-half part of the form and display the fields that were configured against the Task Type.
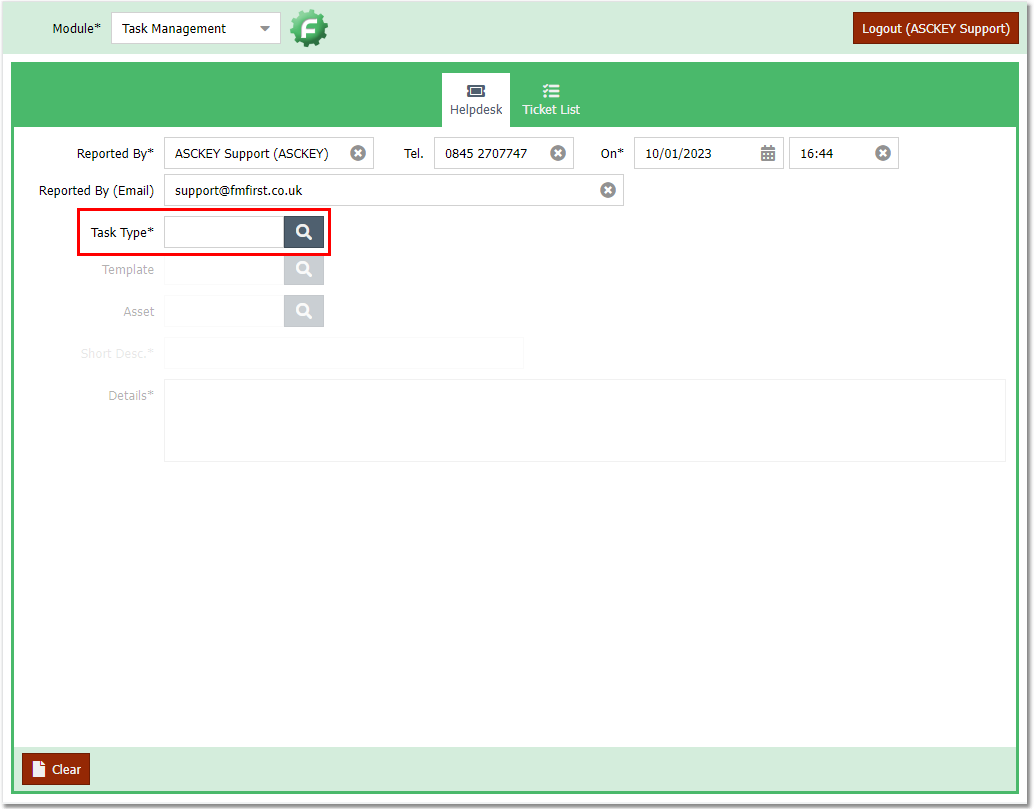
If a template is available for a specific task type, then select it first from the Template field. This will then pre-populate the form with the details defined on your selected template.
Populate the form with the rest of the ticket details, the required fields are marked with an asterisk next to the field name e.g. Task Type*
Once the form is complete, press the Create Ticket button on the bottom right of the form:
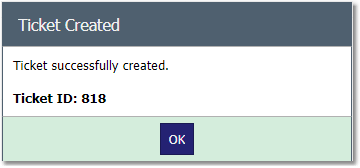
After the ticket is created, you will get a confirmation prompt with the new Ticket ID:
How to create a ticket from the mobile application
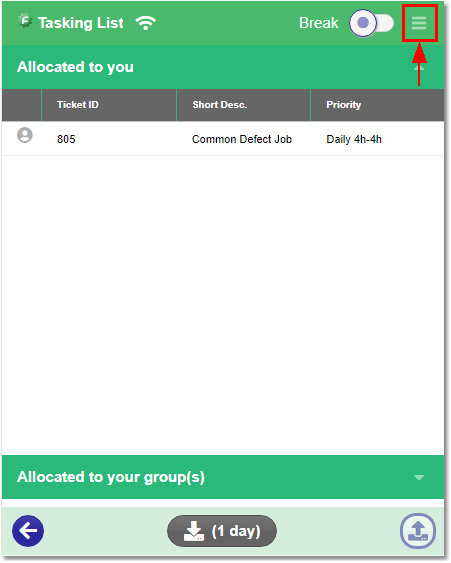
When you log in to the mobile application and go to the Tasking List view, you will see the menu icon on the top left corner of the view.
Before you proceed, please note that your device will need network connectivity for this process.
Click the menu icon and if you have the correct security permissions, then you should see the Create Ticket option on the menu.
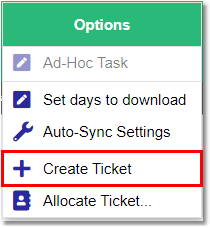
Click the Create Ticket button and this should give you the form you need to fill up to generate a new ticket record.
As all of the ticket form in the system, you must select a Task Type first to display the fields that were configured against the Task Type.
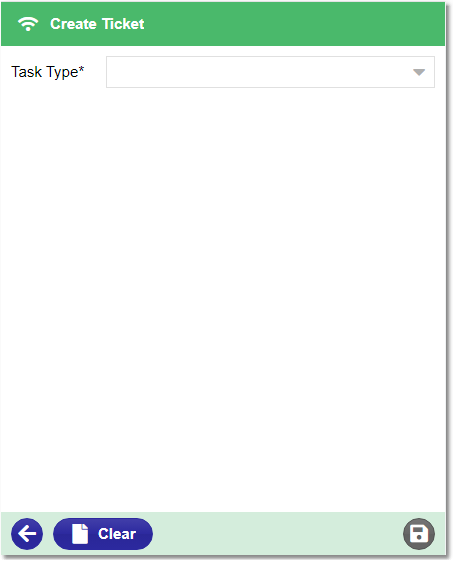
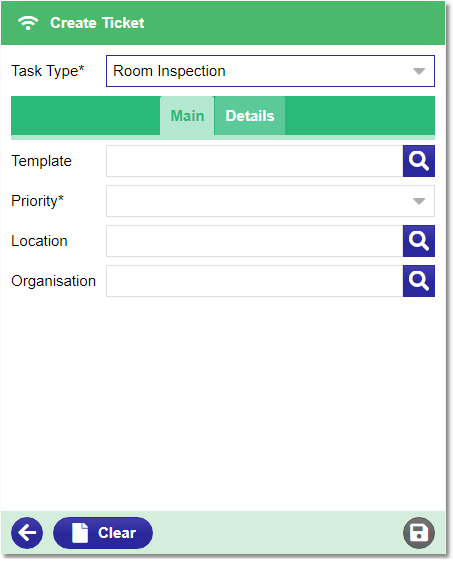
Populate the rest of the form and press the save icon on the bottom-right corner of the view.
Once the ticket is saved, you will get a confirmation message with the new Ticket Id:

The ticket will also get automatically allocated to you as it is created from mobile:
![]()
