|
This page will be all about ticket allocation.
We will go through how tickets can be allocated to one or more users from different parts of the system. |
Before you can use the fmfirst® Cloud Mobile Tasking module, you must first allocate tickets to the mobile user.
The mobile user can only view tickets that are either allocated to them or allocated to the their staff group.
•How to allocate a ticket from the main application Helpdesk view
•How to allocate a ticket from the Task Allocation view
•How to allocate a ticket from the mobile application
•How to allocate a ticket from the Ticket List view
If you haven't created a ticket yet, you can create tickets by following the How to create tickets guide.
To allocate a ticket to a user, they must first have access to at least one Task Management view e.g. Mobile Tasking.
Once a ticket is allocated to the user, they will be able to view or download and action the ticket from the mobile application.
If they were logged in to the mobile application at the time of allocation, they will receive a notification from their device informing them that a new ticket has been added to their list.
Note, they will only receive a notification if they have clicked the Enable Push Subscription from the mobile app Settings page.
Before you begin, you will require access to the Task Helpdesk / Task Allocation / Mobile Tasking / Ticket List view along with the Amend permission on the view.
How to allocate a ticket from the main application Helpdesk view
Go to the Task Management / Task Helpdesk view and load the ticket record by using the Ticket ID Lookup. (If you already know the Ticket ID, then type it in the field and navigate away from the field).
Once the ticket record is loaded in the view, navigate to the Allocation tab.
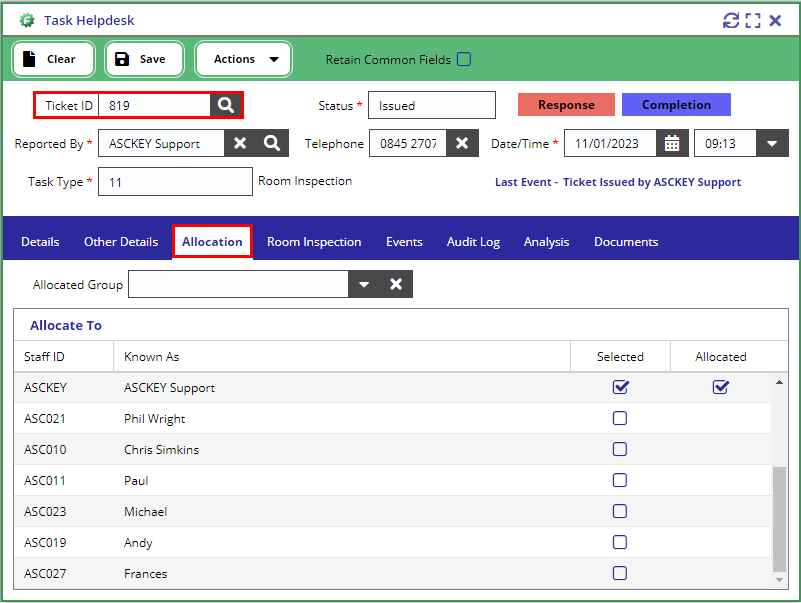
There are 2 columns you need to check, the Selected column and the Allocated column.
If the Selected column is checked, then it means that the user is selected for the job but they won't see the ticket on their device (this is used for pre-planning tickets).
If the Allocated column is checked, then it means that you are allocating the ticket to the user and they will be able to download and action the ticket from the mobile application (you can only check the Allocated column if the Selected column is already active).
How to allocate a ticket from the Task Allocation view
Go to the Task Management / Task Allocation view.
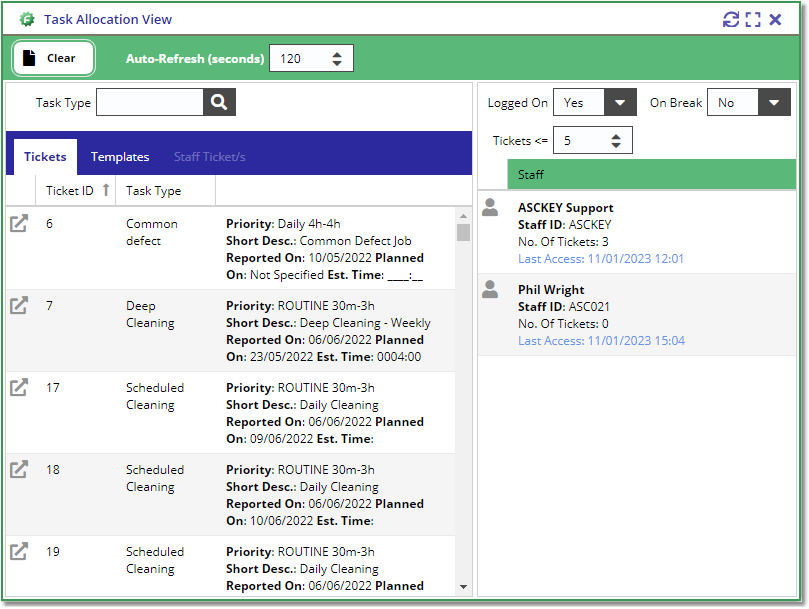
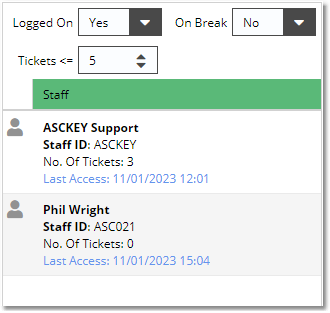
On the right grid, you should see the available users with access to the Task Management module.
By default, the list will be filtered by:
Logged On = Yes, On Break = No, and User with tickets less than or equal (Tickets <=) to 5.
You can change the filters if required and the grid will automatically reload.
|
|
|
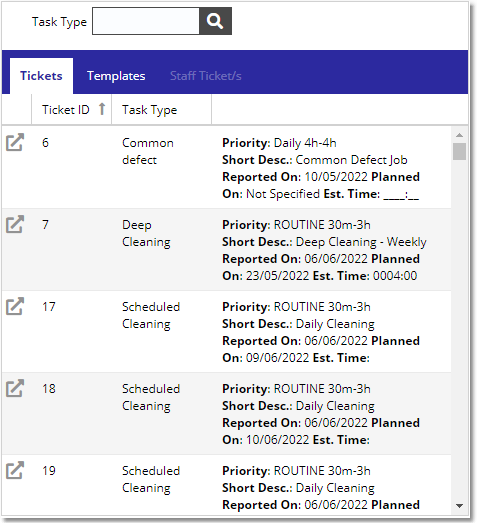
On the left panel, you will see the Tickets tab and the Templates tab.
If you want to both create & allocate tickets from the Templates tab, click here to see the guide.
All the existing outstanding tickets can be seen from the Tickets tab.
You can filter the 2 grids by selecting a Task Type at the top part of the panel.
|
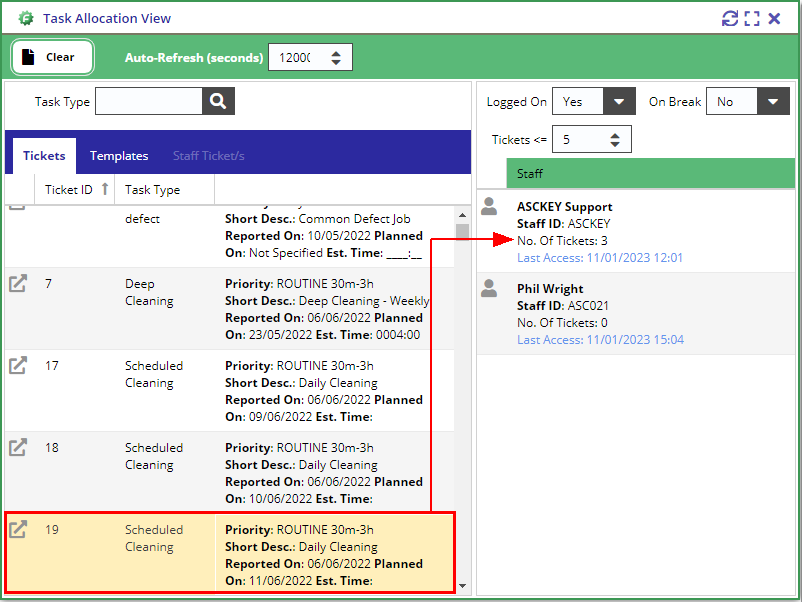
When you find the ticket that you want to allocate to the user, select the ticket from the list and drag & drop the ticket record to your selected staff.
For example, if we want to allocate Ticket ID 19 to Asckey Support, select it from the Tickets list and drag it to the Staff List and drop it on top Asckey Support:
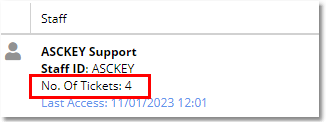
Once the ticket is successfully allocated, you will see the No. of tickets count against your selected staff increase.
How to allocate a ticket from the mobile application
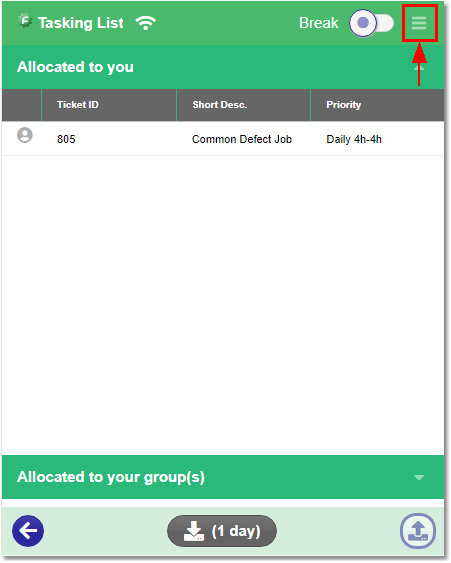
When you log in to the mobile application and go to the Tasking List view, you will see the menu icon on the top left corner of the view.
Before you proceed, please note that your device will need network connectivity for this process.
Click the menu icon and if you have the correct security permissions, then you should see the Allocate Ticket option on the menu.
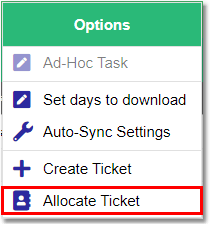
When you tap the Allocate Ticket button, it will navigate you to the Allocate Ticket view.
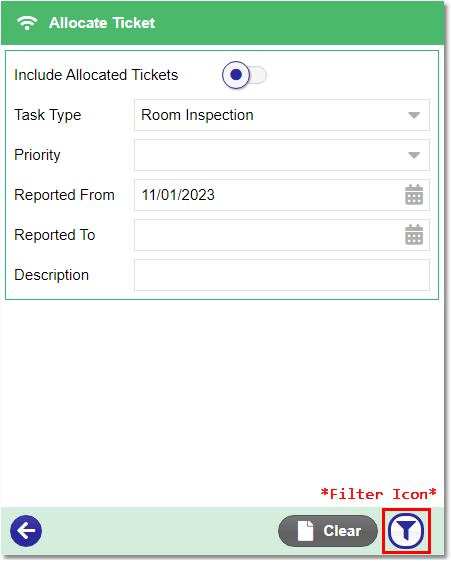
You will be given a filter form so you can query the tickets in the server. To easily find the correct ticket, populate the filter form with the ticket information then press the filter icon on the bottom-right corner of the view.
For example, if you want to find all the outstanding Room Inspection tickets that were reported on 11/01/2023, then filter by:
Include Allocated Tickets: **Off** Task Type: Room Inspection Reported From: 11/01/2023
|
|
Once you have found the correct ticket, select / tap the ticket from the list. This should then navigate you to the list of available staff.
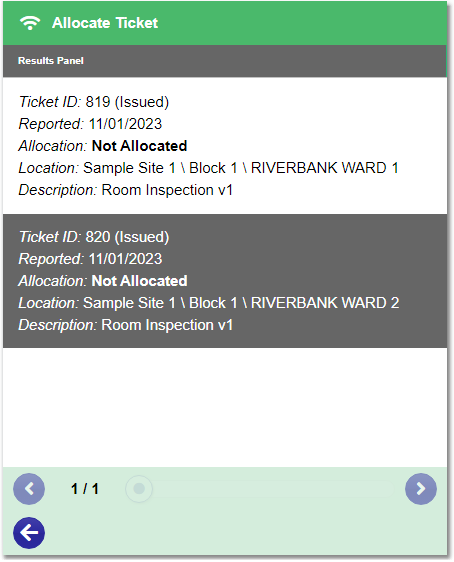
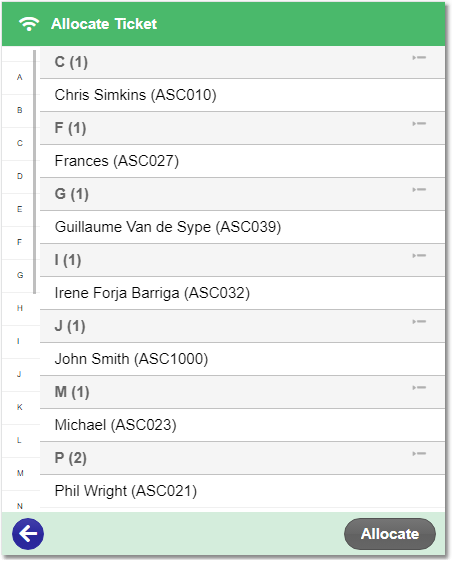
Select a user from the list of whom you want to allocate the ticket to, then press the Allocate button on the bottom-right corner of the view.
You should get a confirmation message once the process is complete.
![]()
If the selected user is logged in on the mobile app, they will get the ticket when they refresh or re-download the ticket list.
How to allocate a ticket from the Ticket List view
Go to the Task Management / Task List view. Populate the Filter Form so you can easily find the correct ticket/s then press the Apply Filter button.
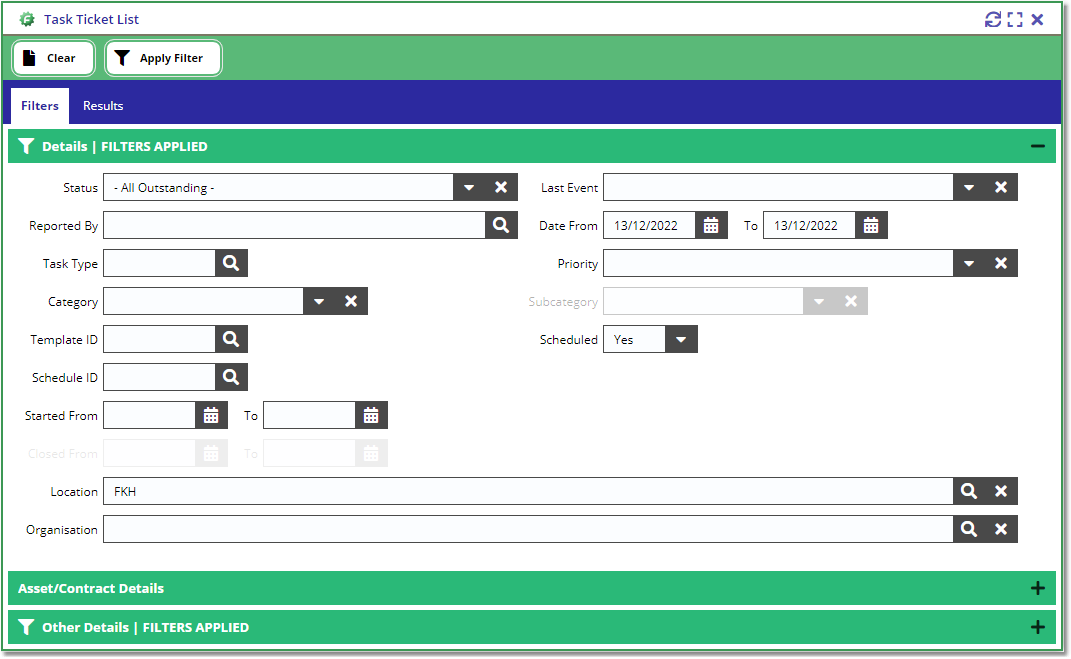
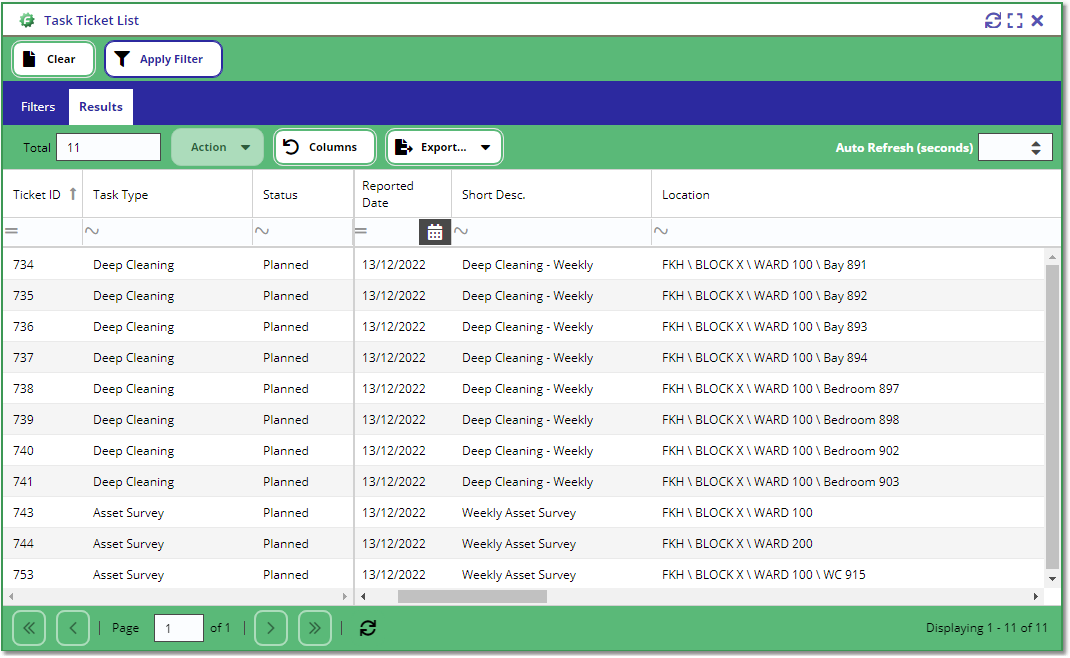
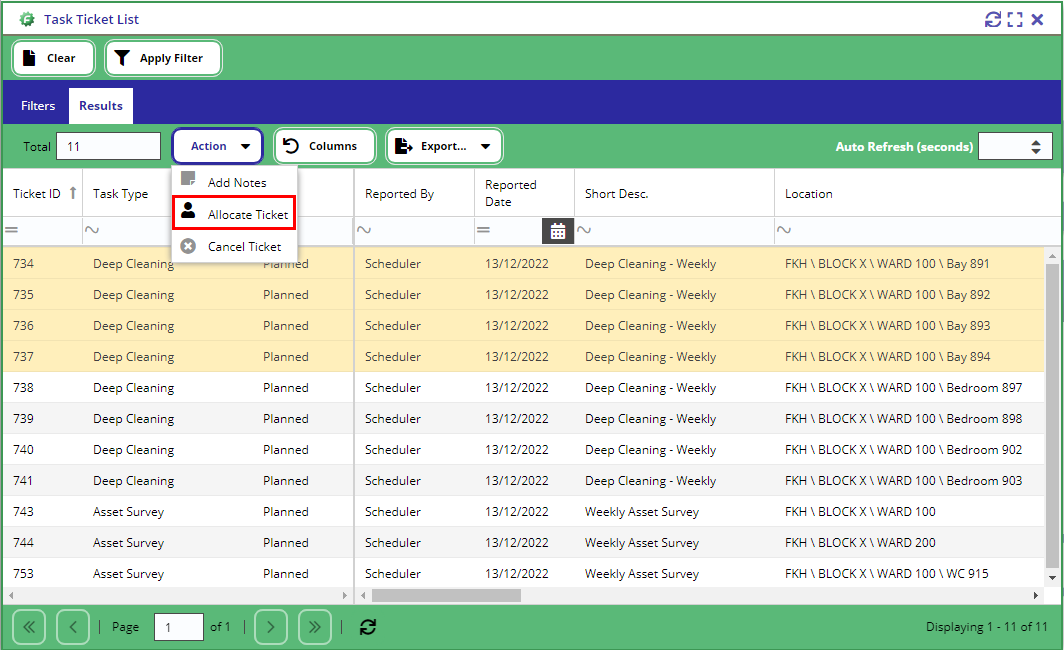
Select 1 or more ticket from the list (you can multi-select tickets from the list by holding down the Shift or Ctrl key from your keyboard).
Then click the Action -> Allocate Ticket button from the toolbar.
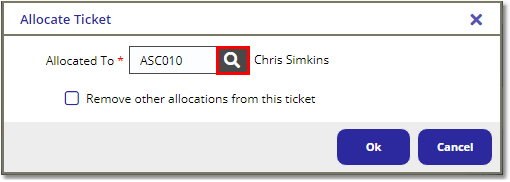
When you get the Allocate Ticket pop-up window, click the search icon from the Allocated To* field to launch the Staff Lookup and find the user whom you want to allocate the ticket to.
Press Ok to start the allocation process. You should get a loading mask to show you how many tickets are being allocated to the user.
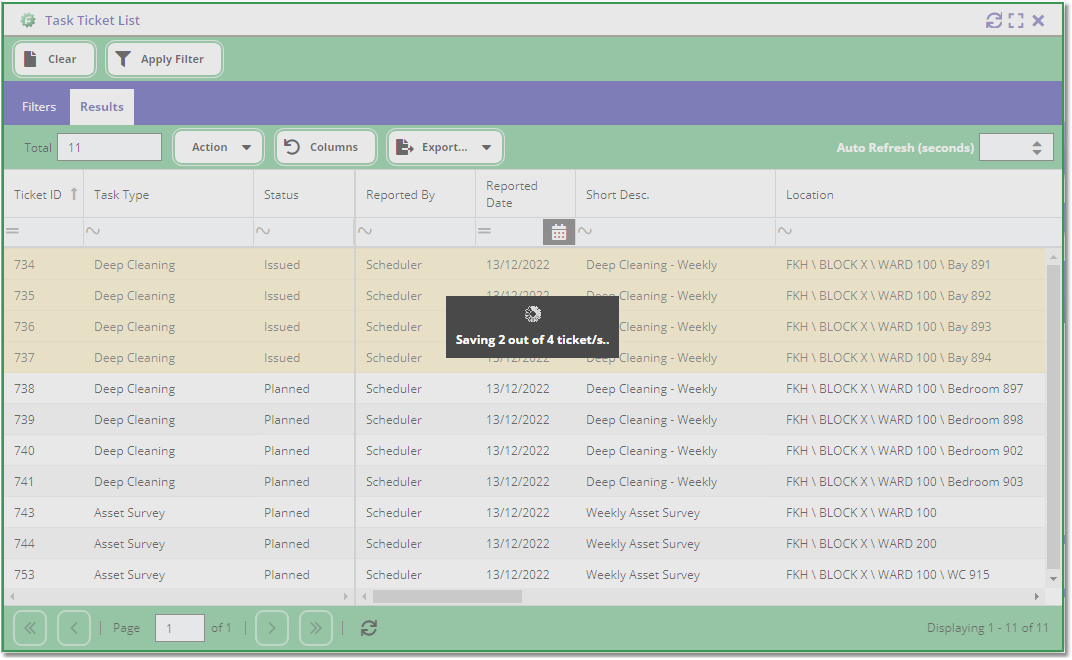
A confirmation box will appear momentarily to indicate that the allocation process is finished.

