|
The automated reports are triggered when audits are completed via the mobile application. This page will go through how to set up the automated reports and how to set up the report recipients. |
•Setting up the automated reports
•Setting up report recipients for non-timed triggers
•Setting up report recipients for timed triggers
Setting up the automated reports
To set up automated reports, go to Menu > Common Maintenance > Automated Report Triggers.
Populate the form, the required fields are marked with a red asterisk*, then click the Save button.
Trigger |
Which action triggers the automated reports e.g.: (Cleaning) Sign off Audit - Triggers the automated reports when the monitoring audit group is signed off. (Survey) Commit Survey Failed - Triggers the automated reports when a survey is committed and has achieved a failed score.
|
Send To "X" |
For Cleaning - Checking this will also send the email to the Auditor For Survey - Checking this will also send the email to the Allocated staff For Tasking - Checking this will ONLY send the email to the Reported By (Email)
|
You can use the report placeholders from the right toolbar to replace texts in the email Subject & Message Body (e.g. Location Path, Audit Date, Overall Score):
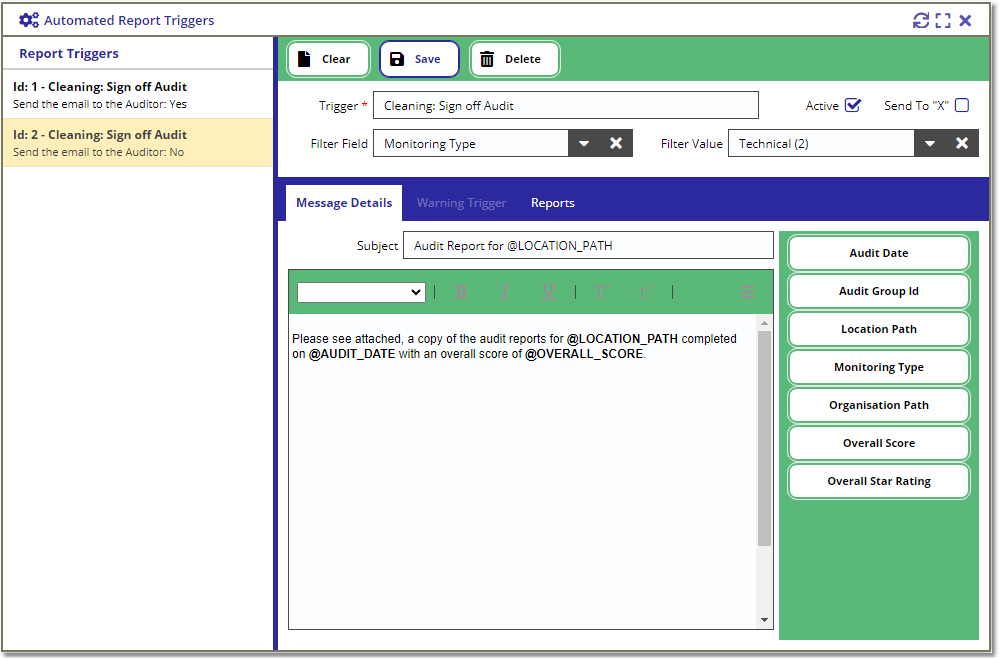
To apply filters to the automated trigger, navigate to the Filter & Frequency tab and populate the Filter Field and Filter Value.

Filter Field & Value |
- Optional -
The options for the Filter Field box are: For Cleaning - You can select Monitoring Type For Survey - You can select Grid Template For Tasking - You can select Task Type or Event Code
If you want to filter the automated trigger to a specific type then you can use the 2 fields to apply the trigger filter. E.g. For Cleaning, if you only want to send the automated reports for Technical audits, then select "Monitoring Type" from the Field box and find "Technical" from the Value box.
|
For Example:
Message Body:
"Please see attached, a copy of the audit reports for @LOCATION_PATH completed on @AUDIT_DATE with an overall score of @OVERALL_SCORE."
The above message body will be converted to:
"Please see attached, a copy of the audit reports for Sample Site 1 / Block A / Ground Level / Ward 101 completed on 01/02/2025 with an overall score of 95.70%."
Timed Automated Trigger and Warning Triggers
If you have selected any of the timed or warning triggers e.g. Timed Audit Report, Audit Failure Warning, Asset Ticket Warning, etc., then you will need to fill in the trigger frequency details from the Filter & Frequency tab.
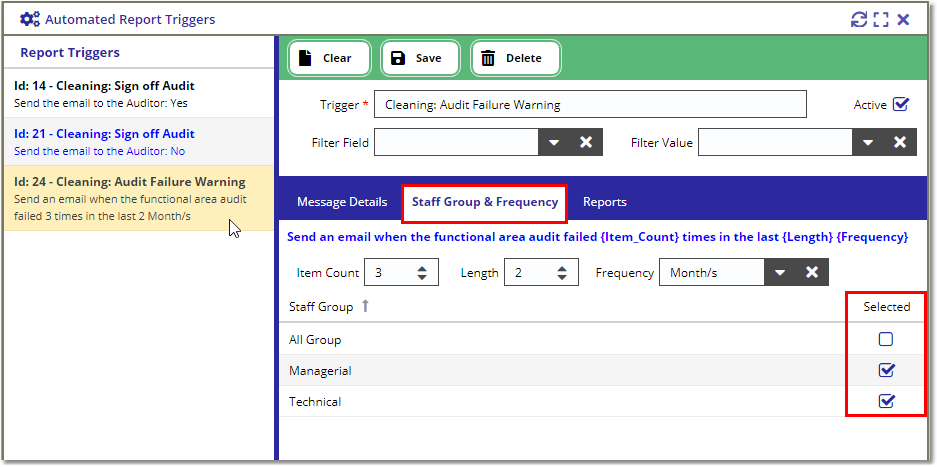
Fill in the Item Count, Length, and Frequency fields as shown below:
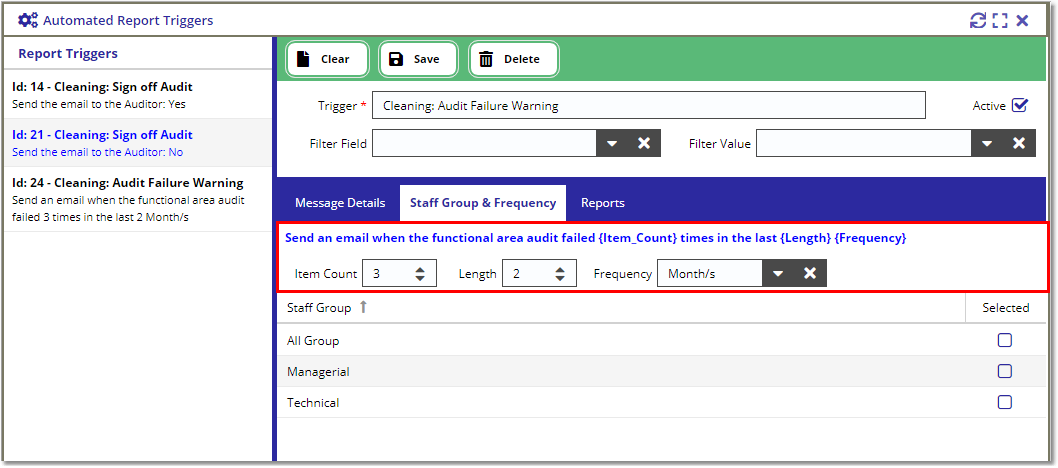
The above values translate to: Send an email when the functional area audit failed 3 times in the last 2 Month/s.
You will also need to select a Staff Group from the grid to indicate which group you want to send the report to. You can do this by following the steps in this link.
How to setup the trigger reports
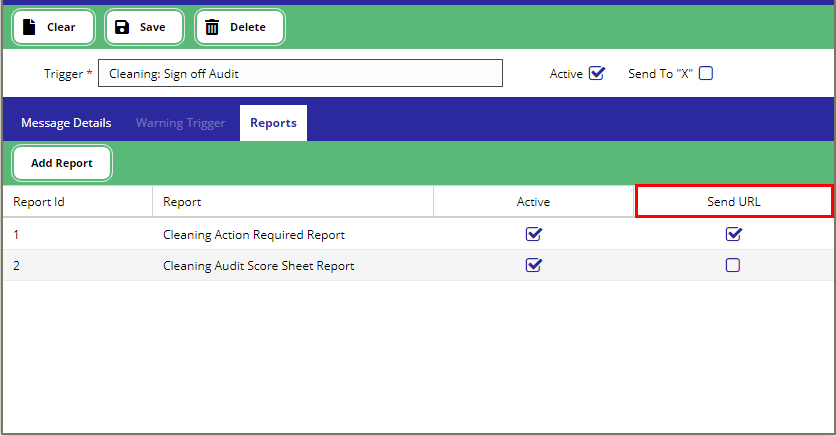
Once saved, click on the Reports tab. Click on the Add Report button and select 1 or more reports from the pop-up box:
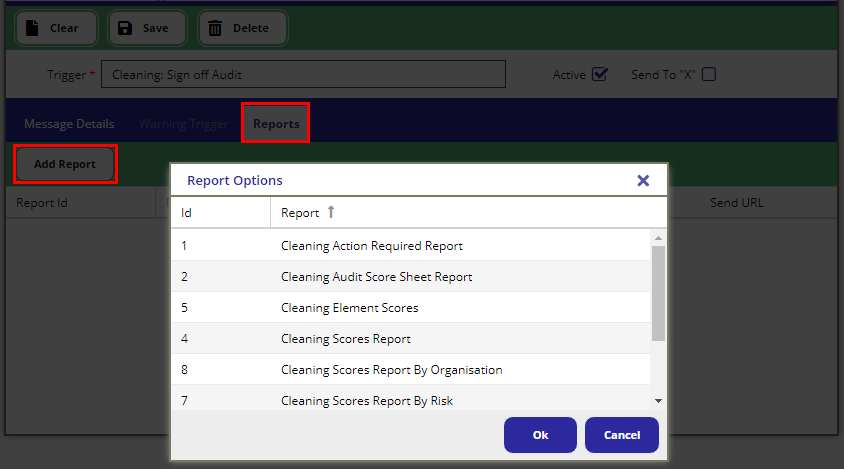
After adding the reports in the list, you can choose to activate the Send URL flag.
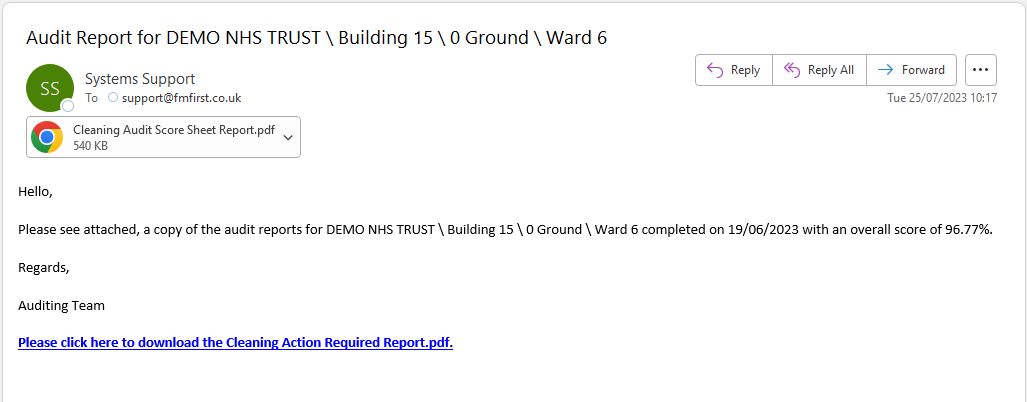
If this flag is activated, a download URL will be appended at the bottom of the message body instead of a report attachment.
This is useful for big reports with images like the Cleaning Actions Required Report, which can sometimes get over the 20MB limit on the email.
Sample generated email:
Setting up report recipients for non-timed triggers
There are several configurations required to set up which user gets included in the list of recipients.
Staff - Receive Reports flag and Location Configuration
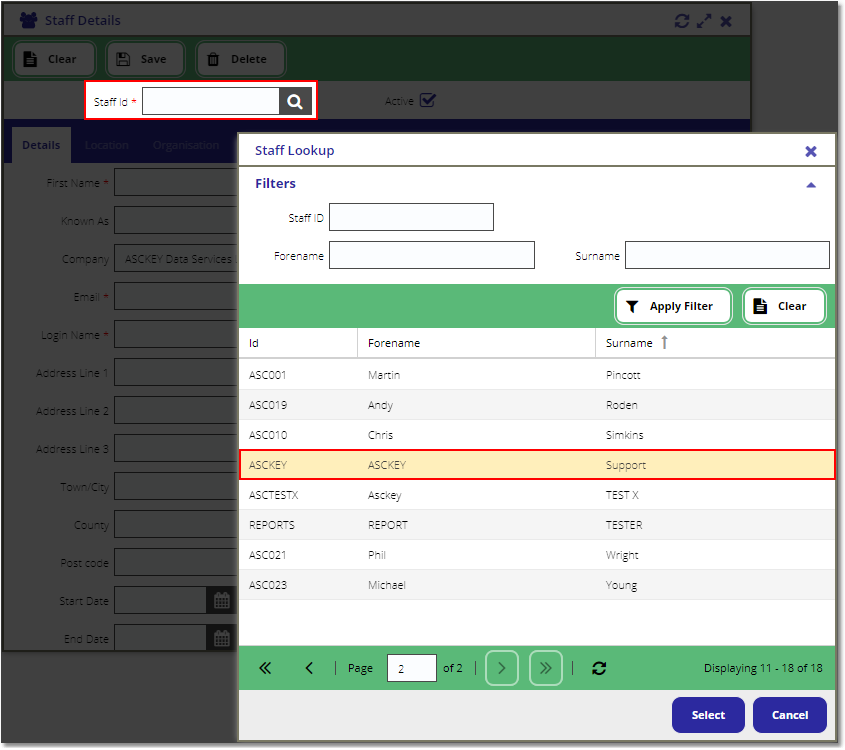
To configure the Receive Reports flag and Location, go to Menu > Staff > Staff Details. Load the Staff record on the view by clicking on the search icon, this will open the Staff Lookup window. Find the staff from the lookup and select the record by double-clicking or highlighting the row and clicking the Select button:
Once the Staff record is loaded on the Details form, check the Receive Reports flag:
Note: The automated reports will get sent to the same email address defined on the Email field in Staff Details view.

After setting the Receive Reports flag, navigate to the Location tab. Assign the staff record to one or more locations by checking the Selected column.
Assigning a Staff record against a location means that every time a user signs off an audit against the location, the user will get an automated report sent their email e.g.:
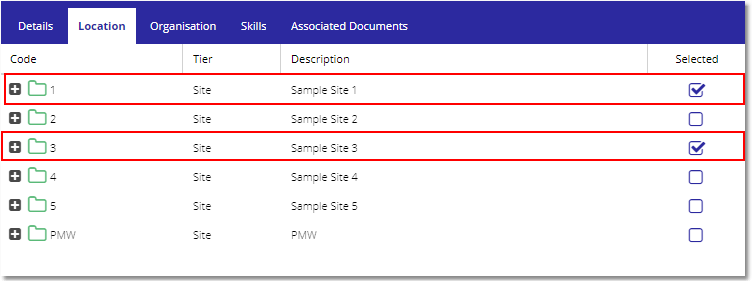
The configuration above means that an automated report email will get sent to support@fmfirst.co.uk for all audits carried out on Sample Site 1 and Sample Site 2.
Alternatively, if you want to assign the Staff to specific functional areas, expand the tier by clicking on the [ + ] button and to find the functional area:

System Security - Report access
Another configuration required is to give the Staff record access to the reports configured in the Report Triggers.
Go to Menu > Security > Security Control view, navigate to the Access Rights tab and open the Staff lookup by clicking on the search icon on the Staff Id field. Find the Staff record to load it on the view.
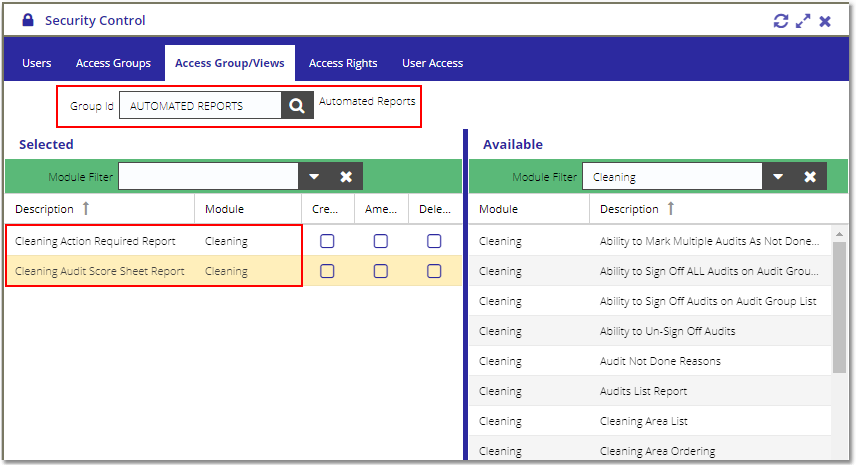
For this example, we have created a System Group called Automated Reports, then gave the group access to Cleaning Action Required Report and Cleaning Audit Score Sheet Report (If you want to find out how to create a System Group access, click here):
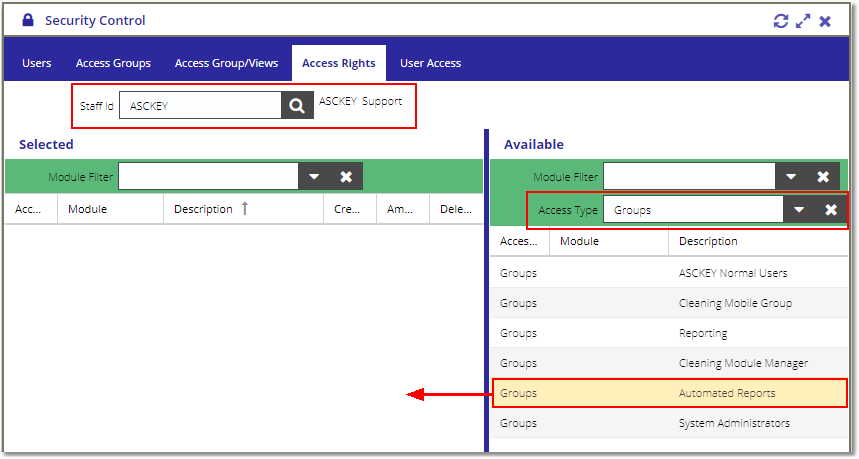
Assign the Staff to the Automated Reports group by filtering the Available list with Access Type = Group, then drag and drop the Automated Reports group from the Available list to the Selected list:
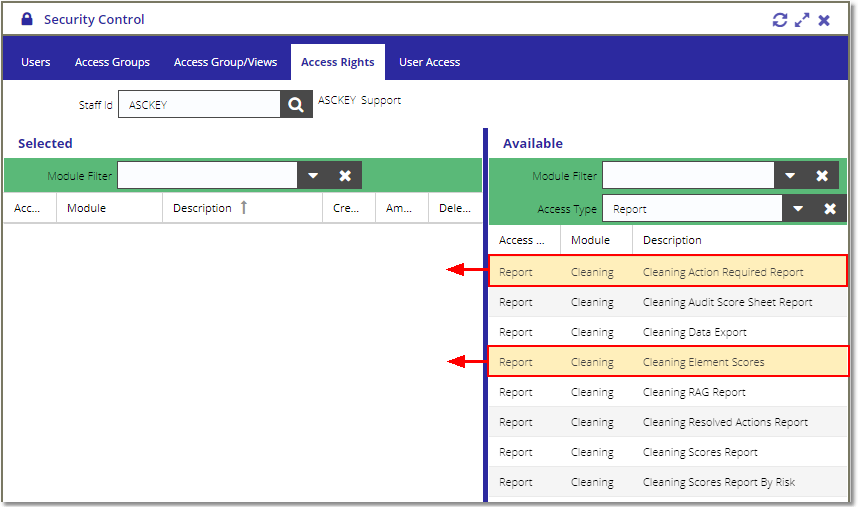
If you want the user to receive specific reports, instead of assigning them to an access group, you can filter the Available list by Access Type = Report, then drag and drop the specific reports to the Selected list:
Setting up report recipients for timed triggers
To set up the recipients for the timed or warning triggers will need to assign staff to a group. You can do this by following the steps in this link.
Once you have assigned the staff to a group, go to Maintenance > Automated Report Triggers view.
Select the trigger from the left menu, then navigate to the Staff Group tab. Select the group from the grid by ticking the relevant boxes as shown below:
