|
This page will be all about completing cleaning audits on a mobile.
There are some system parameters that affect the display on the mobile device. These are:
•Hide Tier 0 Description in Mobile
|
•Downloading audits on your mobile
•Completing an audit and scoring elements
•Marking room audits as "Not Done"
•Adding rooms to an existing audit
Downloading audits on your mobile
Start by logging into your mobile application. For details on how to login, please see our login guide. Once logged in, select the cleaning mobile link.
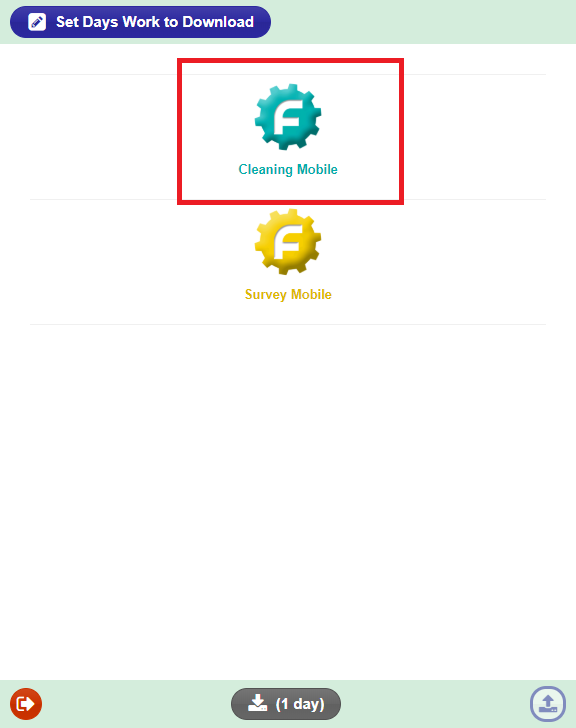
Cleaning mobile link
Once logged in, the download process will start, this will retrieve all of the audits that are allocated to the logged-in user, with an Audit Date less than or equal to the current date.
The user can set the number of work days to download e.g. on a Monday morning (e.g. 09/12/2019), if the user would like to download all audits for that week, the user can set the download days to 7. This means setting the download date to 7 Days where the first day is 09/12/2019 and end date of 15/12/2019.
This will retrieve all audits that have an Audit Date of less than or equal to 15/12/2019.
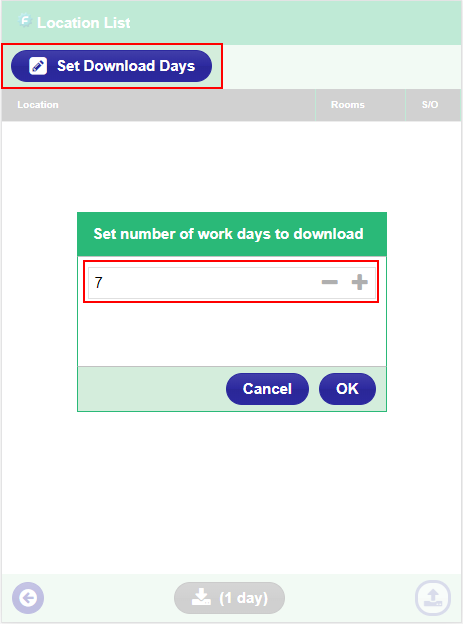
Set download days button
Click the [ Ok ] button to apply the changes. This should update the download button and set the display to [ download-icon (7 Days) ]:

Download button
Click on the [ download-icon (7 Days) ] button to start downloading the audit groups.
The Location List will display the downloaded Audit Groups allocated to the logged-in user e.g.:
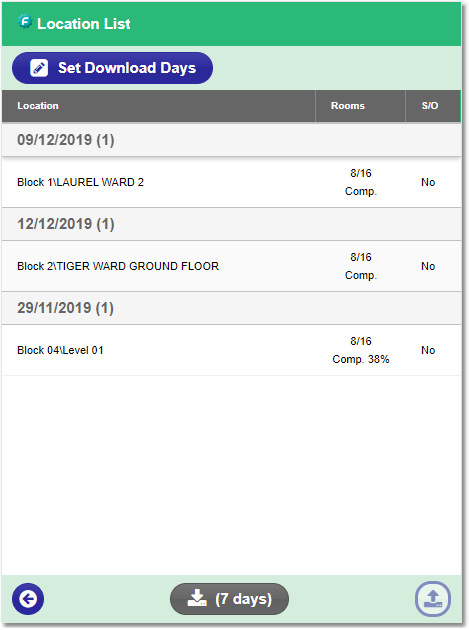
Audit list
Location |
The Audit Group functional area location path.
Note: We have set the Hide Tier 0 Description in Mobile system parameter value to Yes, hence the Site description (Tier 0) is not included in the location path.
|
Rooms |
This column is showing 2 types of information.
The first line is showing the number of room monitoring audits against the number of total rooms in the functional area e.g.:
Location : Block 04\Level 01 Rooms : 8/16
This means the user is auditing 8 rooms out of the 16 rooms in Block 04\Level 01 functional area.
The second line is showing the Completed rooms percentage e.g.
Location : Block 04\Level 01 Rooms : 8/16, Comp. 38%
This means the user has completed 38% out of the 8 rooms to audit.
|
S/O |
Indicates if the functional area/audit group is signed off.
|
Completing an audit and scoring elements
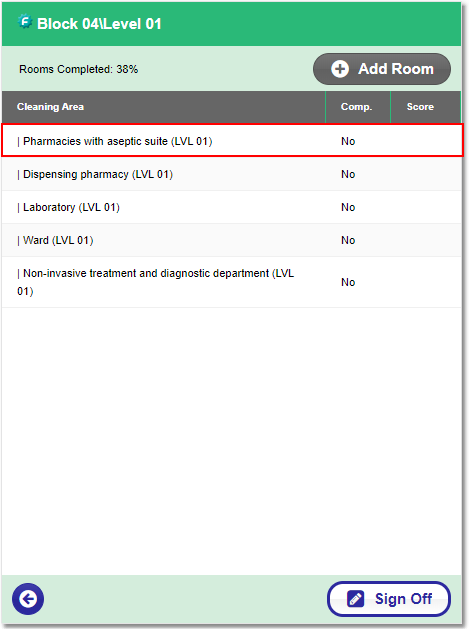
Select an Audit Group from the Location List view (e.g. Block 04\Level 01). This should navigate the user to the Area List view, listing the outstanding room monitoring audits. The user can start auditing the cleaning areas/rooms. Select a room from the Area List (e.g. Pharmacies with aseptic suite), this will navigate the user to the Element List view.
The Element List view will display all the available elements against the selected room.
Note: The background colour on each of the elements indicate the default responsible group per element.
The colour is set from the main application via Menu > Common Maintenance > Table Maintenance > Cleaning > Responsible Groups.
Whilst the element default responsible group is set from Menu > Cleaning > Monitoring Elements view > Responsible Groups tab.
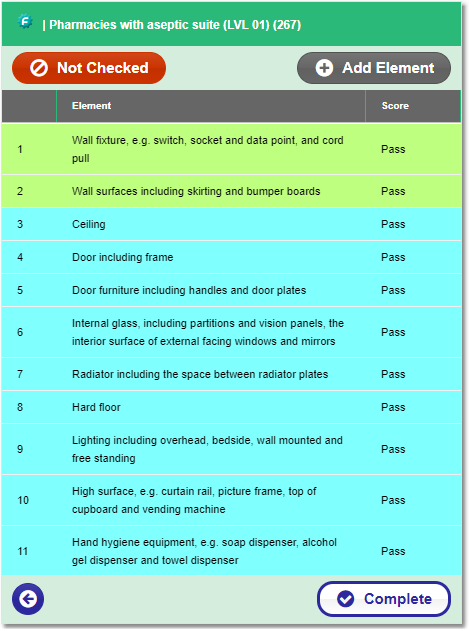
The score of the elements will be defaulted to the value specified in the system parameter Element Score Default Value.
There are three score options when auditing elements: Pass, Fail or Not Present.
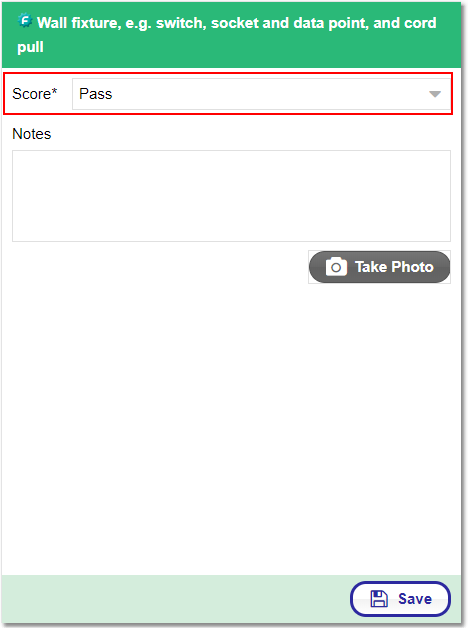
To score an element, select the element (e.g. Wall fixture) from the Element List. This should navigate the user to the Element Result Details view. Tap the Score field to open the score selection list:
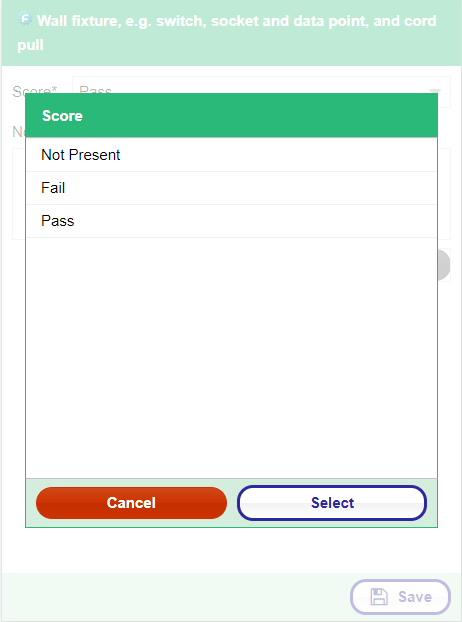
If the user selects Pass or Not Present, no further details are required.
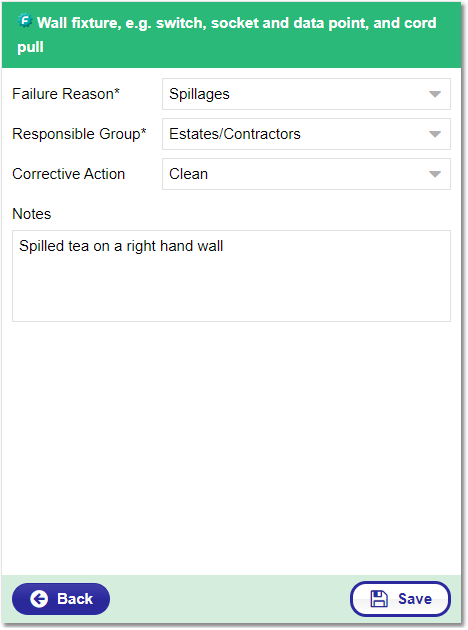
However, if the user selects Fail, the user gets navigated to the Failure Details view. This will allow the user to enter details of the failure (e.g. Failure Reason, Responsible Group, Corrective Action, and Notes) with the ability to add multiple failure reasons for each element.
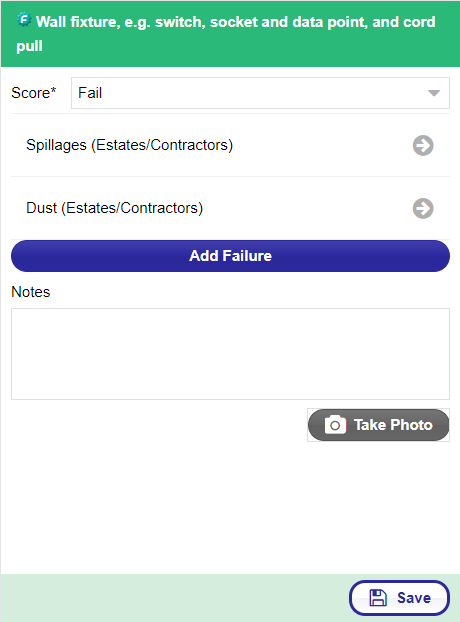
The user can choose to add photos to the elements by clicking on the [ Take Photo ] button.
Depending on the device the user is using, this will either launch the device camera or open the device gallery. Once photo is taken, it should appear at the bottom of the screen:
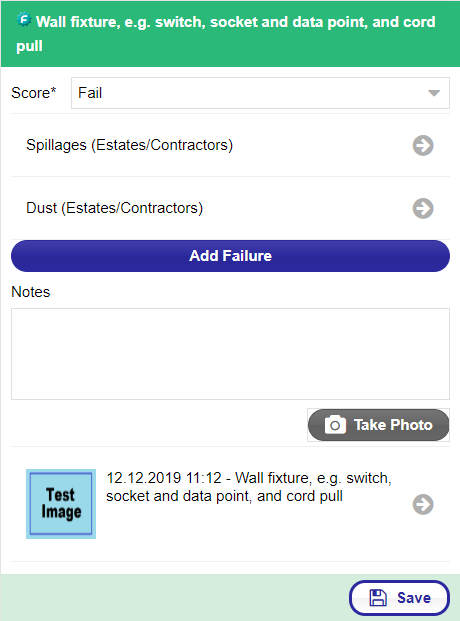
Once the element is scored, the user can add their final notes and click on the [ Save ] button to apply the changes and navigate back to the Element List view.
There is also another way the user can score an element.
Select an element from the list and swipe right to Pass, or swipe left to mark as Not Present:
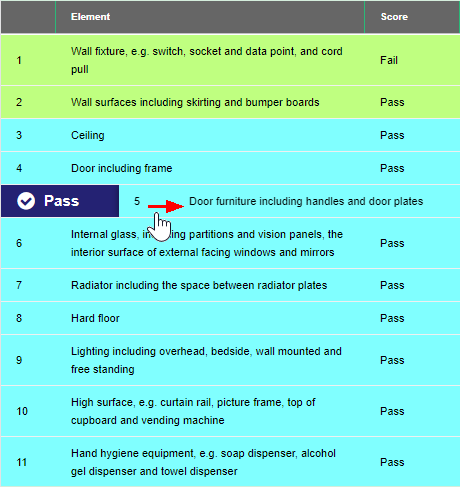
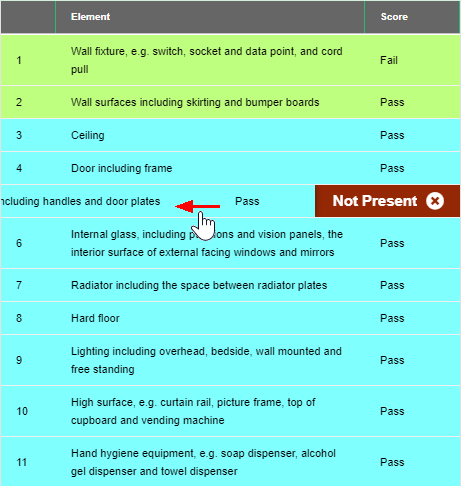
After all the elements have been audited with a score and details of any failures added, the user can complete the room monitoring audit by clicking on the [ Save ] button at the bottom of the screen.
This will navigate the user back to the Area List. If the Hide Scores on Mobile system parameter is set to No, the room score will be displayed next to the room description. The Comp. (Completed) column value should be set to Yes:
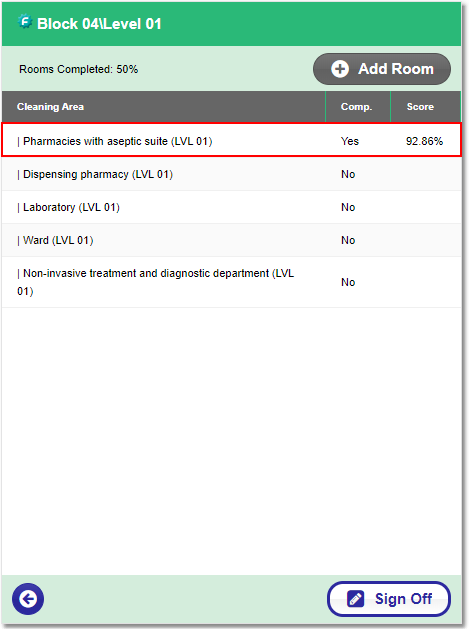
Cleaning area part complete
Marking room audits as "Not Done"
To mark a room audit as Not Done, select the room from the Area List view. This will navigate the user to the Element List view.
The [ Not Checked ] button will be located at the top of the screen, click on the button to open the Room Not Checked selection list:
NOTE: The Room Not Checked options are created from the main application under Menu > Common Maintenance > Table Maintenance > Cleaning > Audit Not Done Reason.
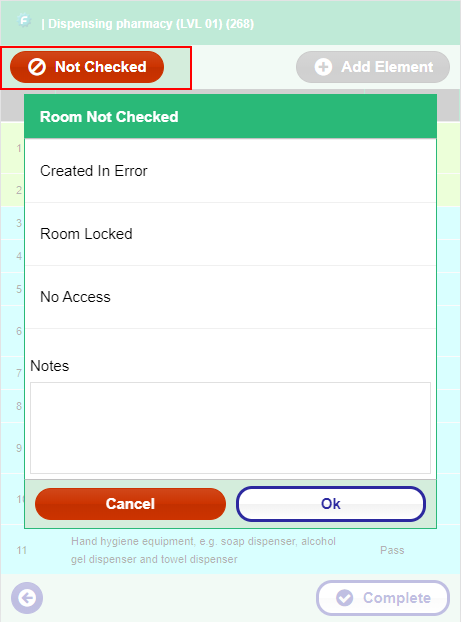
Select an option (e.g. Room Locked) from the list and add notes, then click on the [ Ok ] button.
This will navigate the user back to the Area List view and mark the room as Completed with no score.
Alternatively, the user can swipe left the room from the Area List view to mark the room as Not Done:
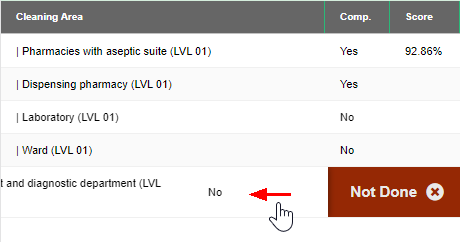
Adding rooms to an existing audit
To add a room to an existing Audit Group, the device will require a network connection.
Click the [ Add Room ] button to display the list of rooms that is not yet included in the Audit Group for the functional area.
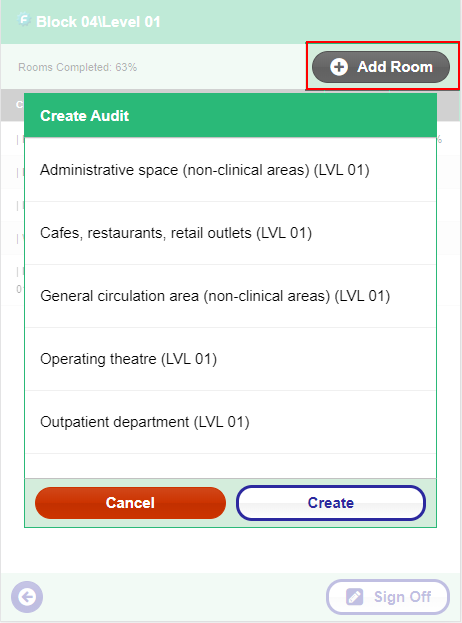
Add Room
Select a room from the list and click on the [ Create ] button. This will create a room monitoring audit record and add it to the existing Audit Group, ready to be assessed.
Once all of the room monitoring audits are completed in the Area List view, click on the [ Sign Off ] button at the bottom of the view:
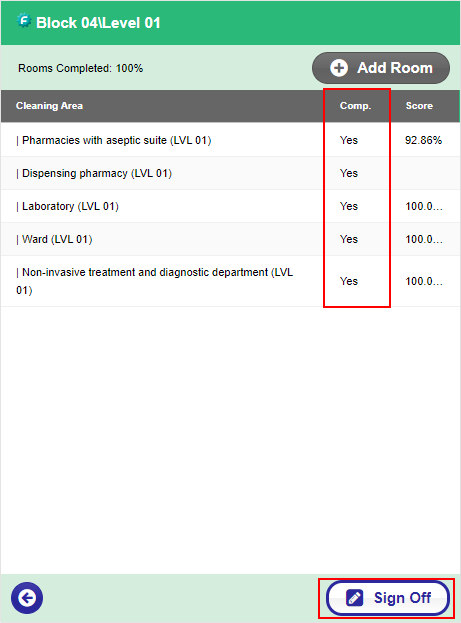
This will navigate the user to the Sign Off Details view.
If the Hide Scores on Mobile system parameter is set to No, an overall score for the completed audits should get displayed in the form.
Fill in the form and add the auditor information by clicking on the [ Add Signature Details ] button:
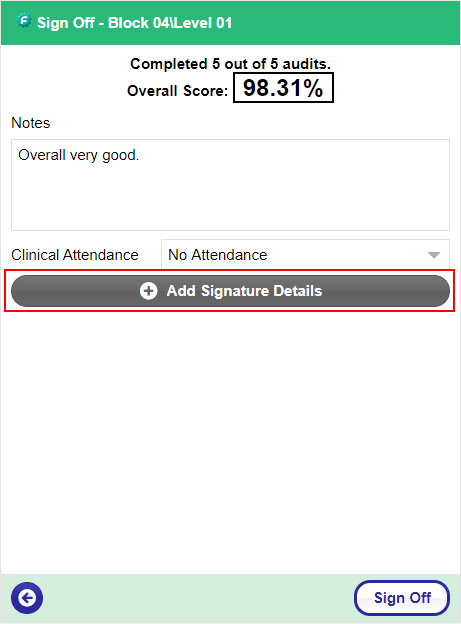
Clinical Attendance |
There are 3 options for this field. These are:
1. No Attendance - indicates that the audit is carried out without a clinical personnel involved. If this value is selected, the user cannot include a clinical person's signature.
2. Partial Attendance - indicates that a clinical personnel is present on some parts of the functional area audit.
3. Full Attendance - indicates that a clinical personnel is present throughout the functional area audit. If this value is selected, the user will be required to add at least 1 clinical person's signature.
|
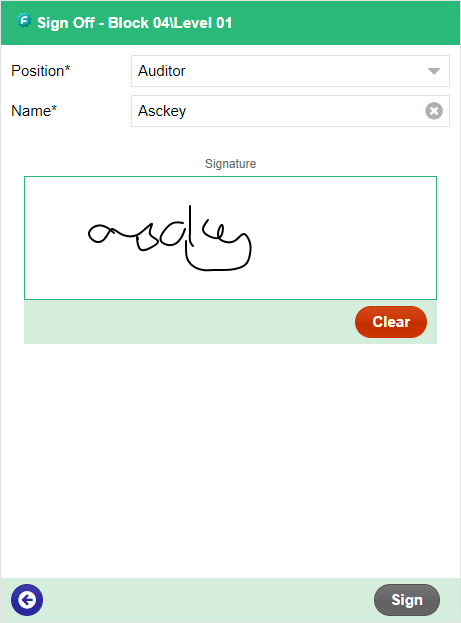
This will navigate the user to the Signatures form. Fill in the Position, Name, and draw a signature on the box provided e.g.:
Position |
The sign off position of the person/s who are present during the audit.
The options in this list are defined in the main application via Menu > Common Maintenance > Table Maintenance > Common Maintenance > Sign Off Position.
Admins can set which sign off positions are Clinical, e.g.: Head Nurse, Ward Sister, etc. This data is required when filling in the Clinical Attendance field on the Sign Off Details form.
|
Name |
The name of the person/s who are present during the audit. |
Signature |
The signature of the person/s who are present during the audit. |
Once the signature form is filled in, click on the [ Sign ] button. This should navigate the user back to the Signature Details view with the signatures at the bottom section of the view:
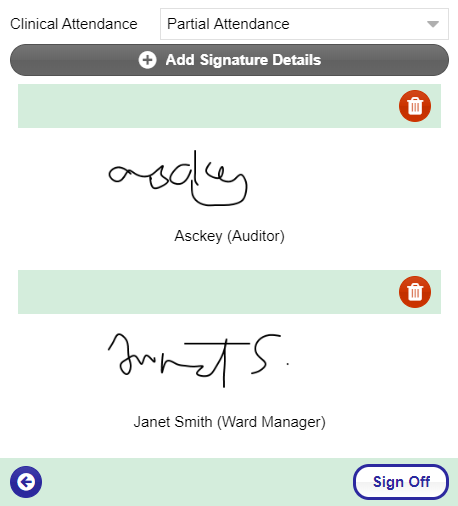
Sign off view with signatures added
Click on the [ Sign Off ] button to save the changes and sync the record to the local storage of the device.
The final step is to upload the audits from the Location List view.
The upload button will display the number of audits it need to upload back to the server.
When clicked, the upload process will upload the data in sequence:
First, it will upload all of the Completed room monitoring audits in batches. Then it will upload all of the Signed Off audit groups in batches.
Once all of the completed/signed off audits are uploaded, it will then trigger the automated reports for the functional areas.
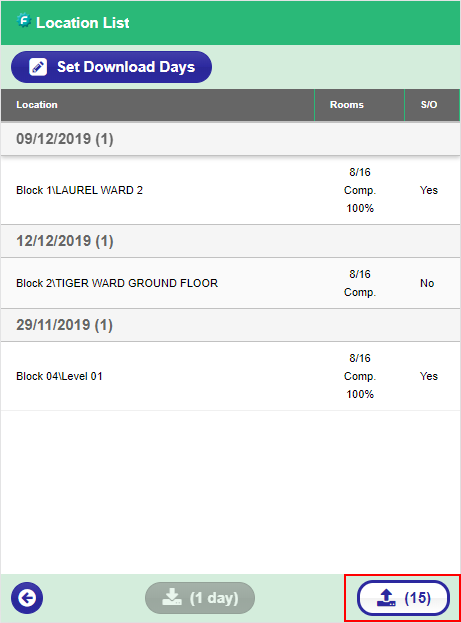
Audit list upload
Once the upload process is complete, the application will do a local storage cleanup and perform a download to refresh the data on the device.
