|
This page will show how to configure the re-auditing mechanism from the main application.
You may also want to look at the following system parameters:
•Reporting - Show Latest Audits Only •Reporting - Use "Original Date" on Re-Audits •Re-audit - Default Audit By (Staff Id)
|
•Configuring the Risk Level Re-audit Percentage
•Setting up the Re-auditable Monitoring Elements
•Explaining the Re-Audit creation process
Configuring the Risk Level Re-audit Percentage
The re-auditing mechanism is designed so the system will automatically create re-audit records for failed rooms and just show elements that have failed on the previous audit.
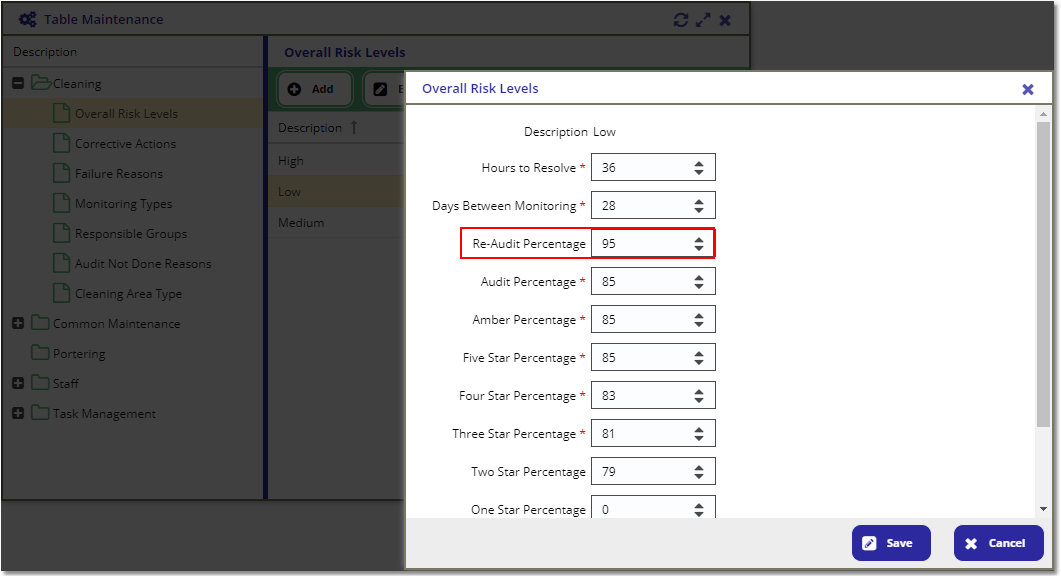
To start the configuration, the user will need to specify the re-audit percentage on the risk level. This is the score the original room audit needs to fall under to create a re-audit record.
Go to Menu > Maintenance > Table Maintenance > Overall Risk Levels and set the Re-audit Percentage:

The Re-Audit Percentage for functional areas with Low Risk level is set to 95%.
When an Audit Group is signed off, the system will look for all Room Audits that achieved a score of 95% or less and generate a Re-audit Group for the "failed" rooms.
Important Note: It is crucial to check that all your audits are valid before signing off the Audit Group, once a Re-audit Group is created, the original Audit Group will be completely read-only and can not be amended by Asckey on request as it may affect the data integrity.
Setting up the Re-auditable Monitoring Elements
The re-audit only lists elements that have failed on the previous audit, however, you need to specify which elements are re-auditable from the Monitoring Elements view.
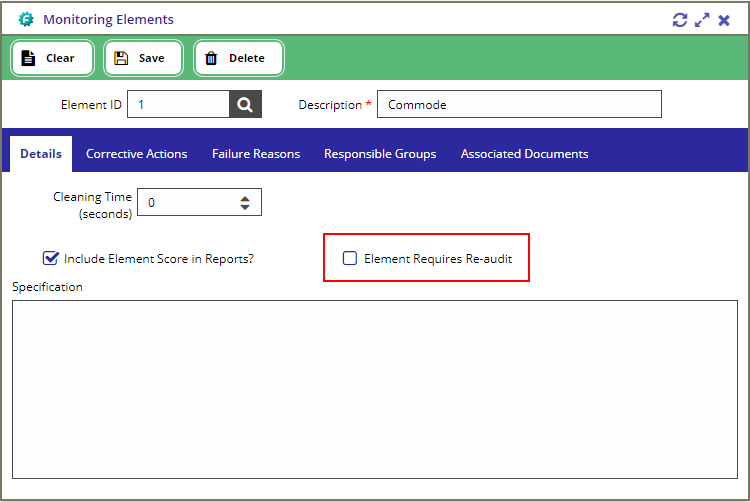
For elements to appear on the re-audit record, you will need to check the Element Requires Re-audit flag from the Menu > Cleaning > Monitoring Elements view.
Select an element, check the flag and click on the Save button.

Explaining the Re-Audit Creation Process
For this example, we will look at the Audit Group for Sample Site 1 \ Block 2 \ LAVANDER WARD 2 (Audit Group ID: 90)
When the Audit Group is signed off and a re-audit record is created, it will only display failed re-auditable elements (as previously mentioned).
The image below shows that for Group ID 90, there are 8 room audits in total, 4 of which achieved a score lower than 95%.
The Next Audit ID column displays the ID of the re-audit record.

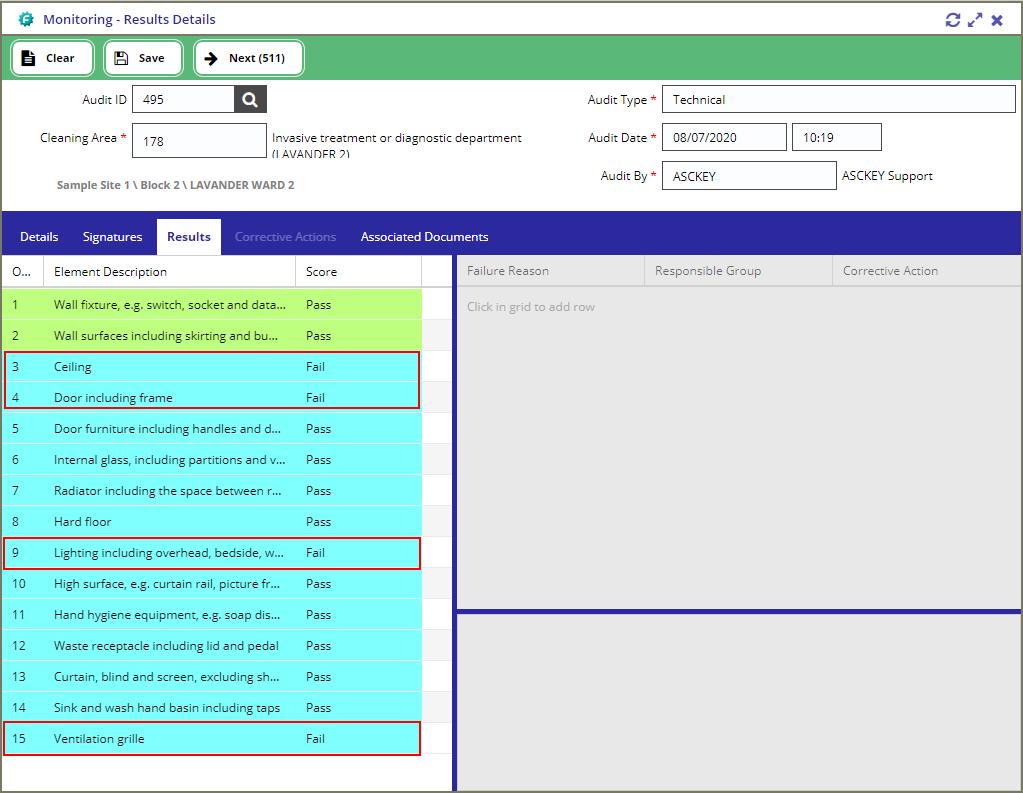
If we load Audit ID 495 to the Monitoring - Result Details view, you will see that there are 4 elements that failed on the original audit:

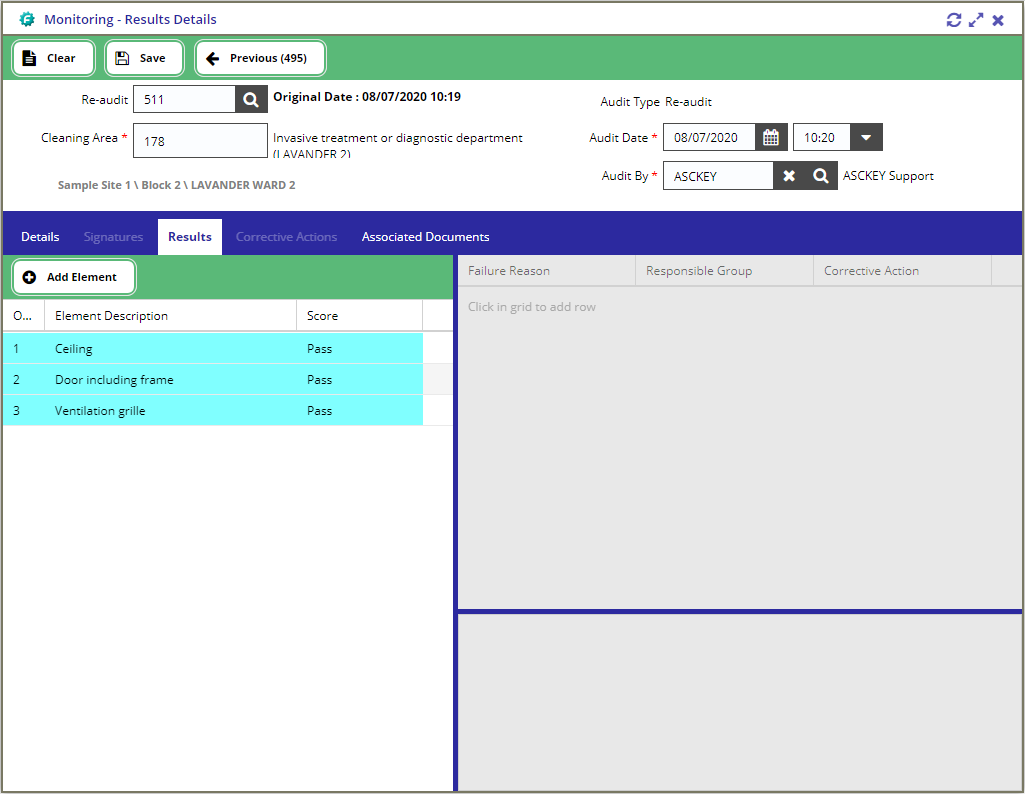
Click on the Next button at the top toolbar which should load the re-audit record.

Only 3 out of the 4 failed elements appeared on the re-audit record because only 3 of them have the "Element Required Re-audit" flag checked on the Monitoring Elements view.
The score of the non-re-auditable elements will not affect the overall score of the re-audit record as they are excluded from its calculation of the available and achieved score.
