|
You will need an fmfirst® Cloud - Portal user account to perform the actions of this 'How To Guide'. This guide will contain sections on how to create a new ticket via the Portal - Task Helpdesk, how to find and view tickets from the Portal - Ticket List, and certain actions that can be performed on a ticket. |

•How to view ticket from the list
•How to add notes, upload documents, or cancel a ticket
Login to the fmfirst® Cloud - Portal Application via the link below:
LIVE |
|
DEMO |
|
BETA |
Select the Helpdesk icon from the Task Management module page.
The Reported By, Date, and Time will be automatically populated by default. Select a Task Type by clicking the search icon:
Note, if there's only one available task type, the record will be automatically selected and loaded in the form for you. However, if there are multiple options available, this will open the lookup as shown below.

Task Type Search Icon

Task Type Lookup
Note for System Administrators: The Task Type lookup will display non-scheduled types with the "Show In Portal" flag enabled from the main application's Task Advanced Options > Task Types tab.
Populate the rest of the Helpdesk form, make sure to populate the Short Desc, Task Details, and select a Location then press the Create Ticket button from the bottom right corner.

Helpdesk - Create Ticket
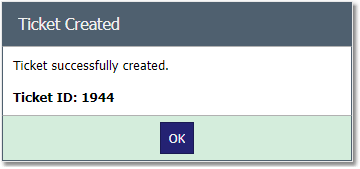
Once the ticket has been created, the Ticket ID will display on the screen. You can use this as reference to the task that you created.
How to view ticket from the list
Select the Ticket List icon from the Task Management module page.
Check the filters in the form, by default the filters will return all the outstanding tickets reported in the last month, and press the Apply Filter button.
The list will return all the tickets that match the form filters within the following criteria:
•Tickets created by the logged in user
•Tickets allocated to the logged in user
•Tickets assigned to the logged in user's location
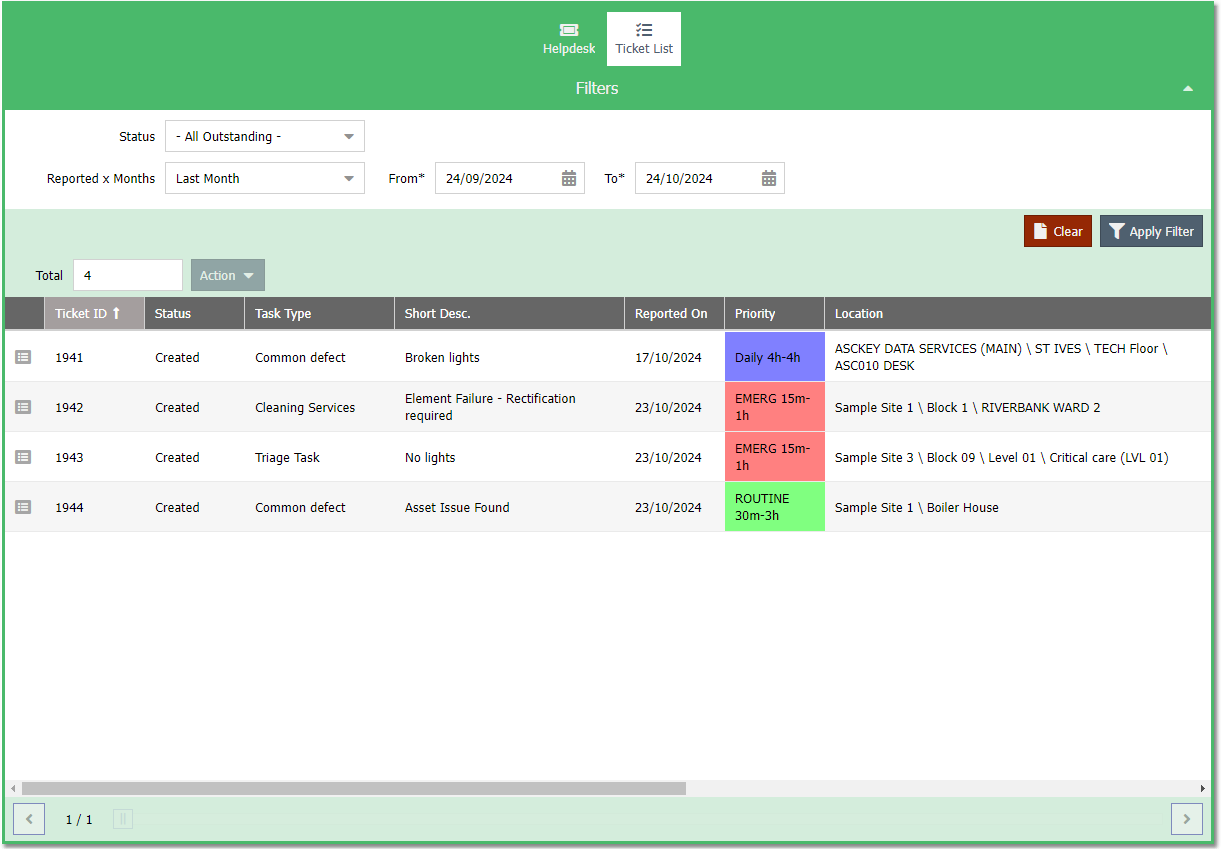
You can scroll to the right to view the ticket details or tap the View Ticket icon on the left of the Ticket ID value.
This will show the full ticket details, as well as the current ticket events and associated documents.

Ticket Details

Events
How to add notes, upload documents, or cancel a ticket
You can add notes or cancel a ticket via the portal's Ticket List view. Follow the steps above to look for the ticket you want to action.
Once you have found the ticket from the list, click the ticket and press the Action button to display the available options:

How to add notes to a ticket:
To add notes to a ticket, press the Action > Add Notes button and this will display the ticket details window with the Notes field at the bottom of the form. Type the notes in the box and press Save.

How to upload documents to a ticket:
To upload documents to a ticket, click the View Ticket icon on the left of the Ticket ID and this will display the ticket details window.
Navigate to the Documents tab and scroll to display the Upload Document form. Populate the form and press the Save Document button.
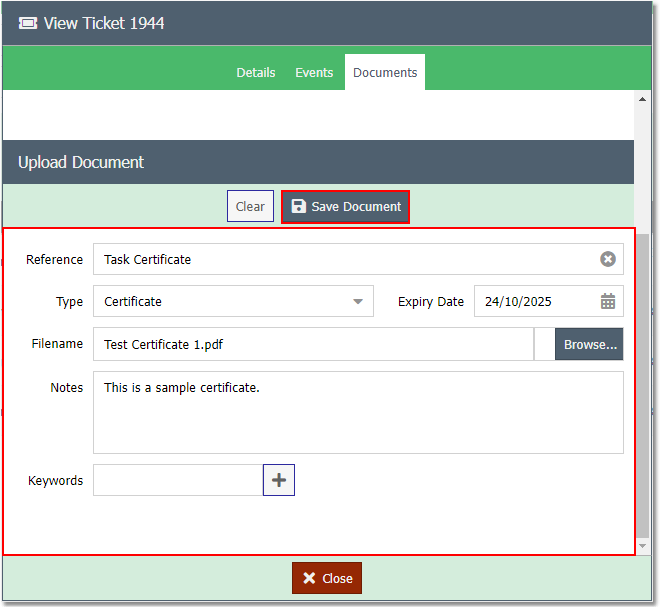
You will get a confirmation box on successful upload and the new document will appear on the document list above the form.
If you need to upload more documents, press the Clear button and repeat the process.
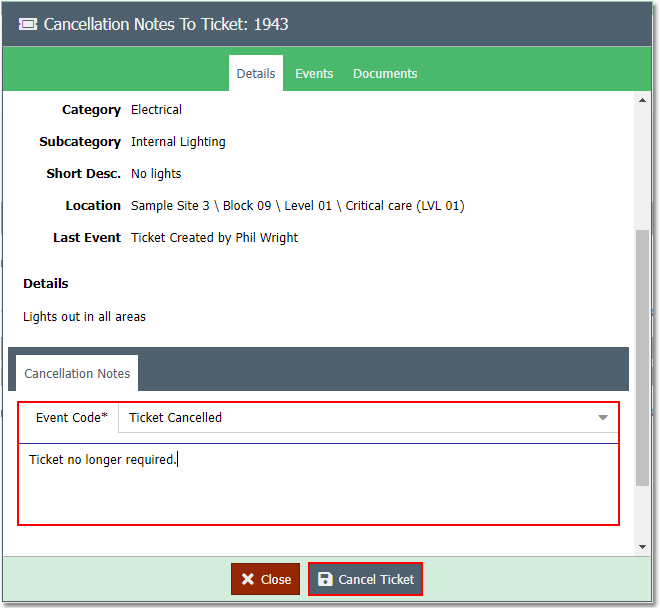
How to cancel a ticket:
To add notes to a ticket, press the Action > Cancel Ticket button and this will display the ticket details window with the Cancellation form at the bottom of the window.
Select a cancellation code from the Event Code field then type the reason for cancellation on the box and press the Cancel Ticket button.