|
You will need an fmfirst® Cloud - Portal contractor account to perform the actions of this 'How To Guide'. This guide will contain sections on how to action / complete a ticket as a contractor. |

•How to re-schedule the ticket's planned date
•How to view the previous work carried out on the ticket
•How to process a ticket / add events to a ticket
Please check the links below before reading this guide:
•How to view ticket from the list
•How to add notes, upload documents, or cancel a ticket
Login to the fmfirst® Cloud - Portal Application via the link below:
LIVE |
|
DEMO |
|
BETA |
How to re-schedule the ticket's planned date
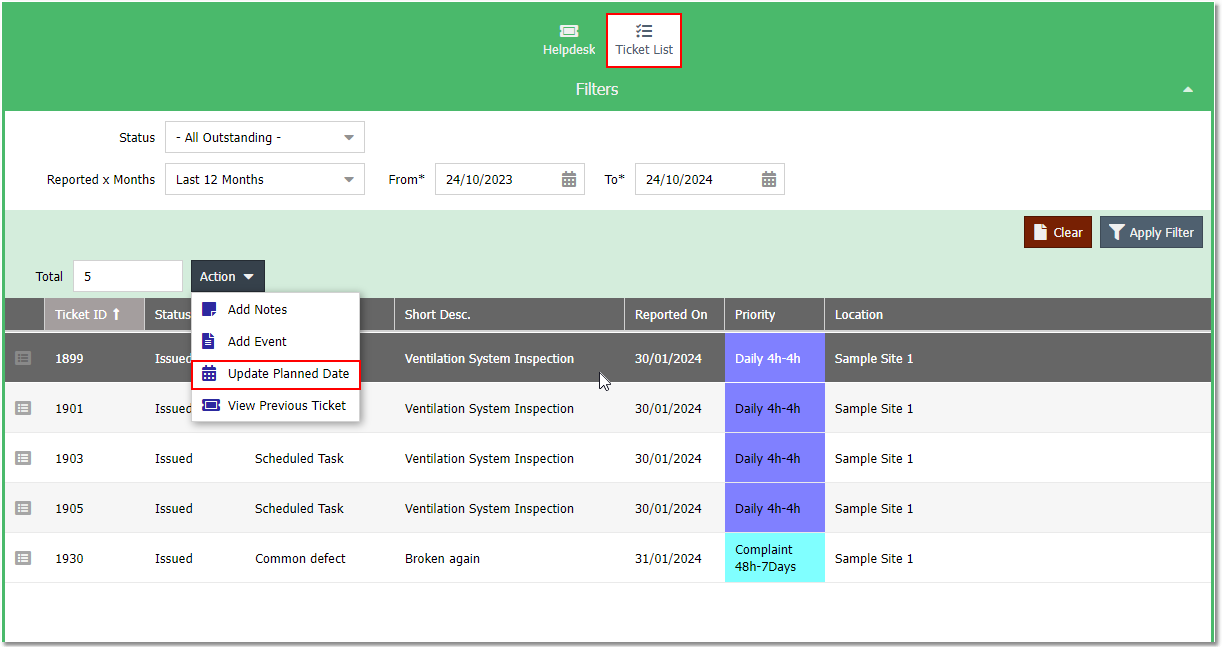
You can re-schedule the ticket's planned date via the Ticket List view. Navigate to the view, apply the relevant filters and press the Apply Filter button.
Select the ticket you want to update from the list and press the Action > Update Planned Date button from the toolbar:
This will display the ticket details window, scroll down until you see the Update Ticket form. Select a new date from the Planned Date field and type in some notes to indicate the why you are rescheduling the ticket then press the Save button.
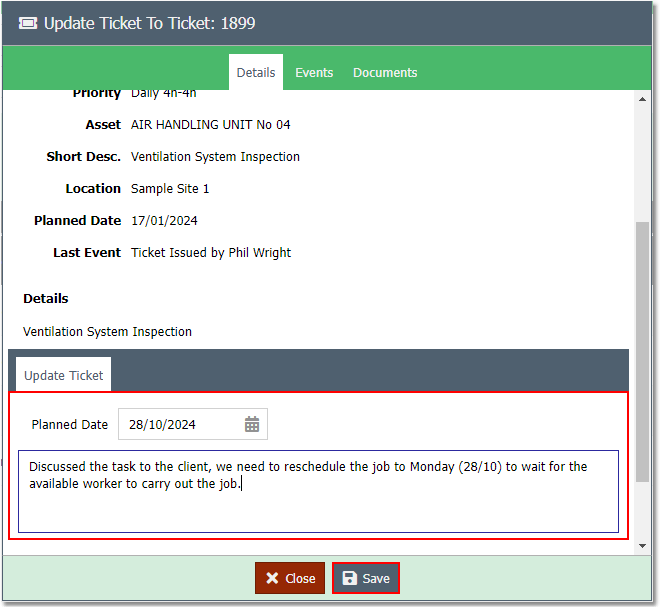
You should see a confirmation prompt once the ticket has been successfully saved.
How to view the previous work carried out on the ticket
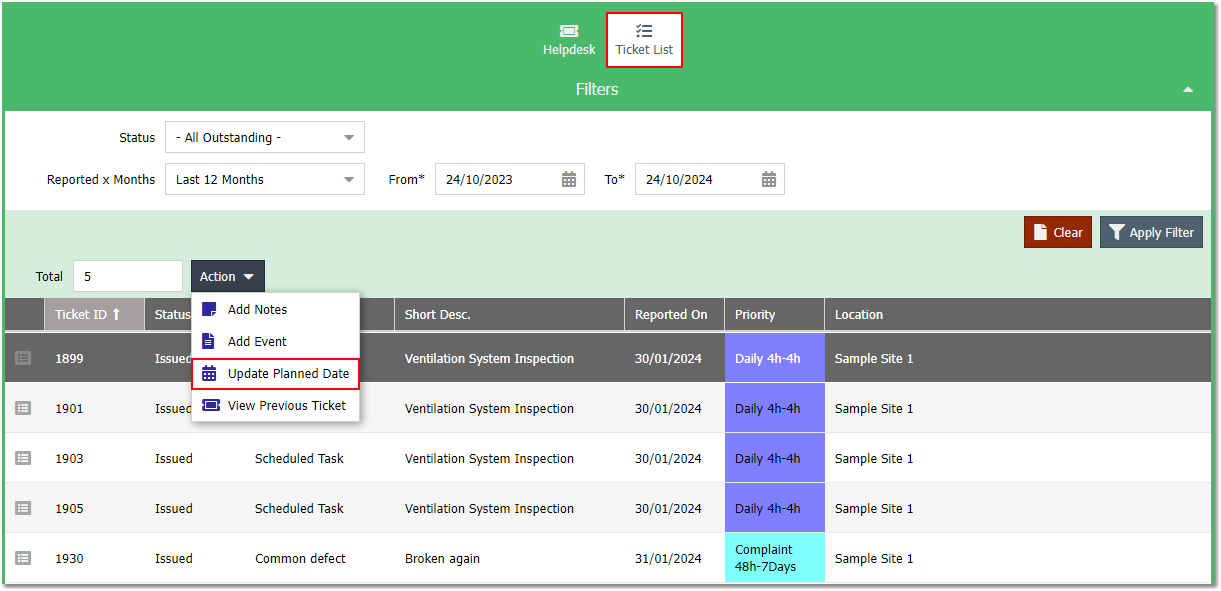
You can add re-schedule the ticket's planned date via the Ticket List view. Navigate to the view, apply the relevant filters and press the Apply Filter button.
Select the ticket you want to update from the list and press the Action > View Previous Ticket button from the toolbar:
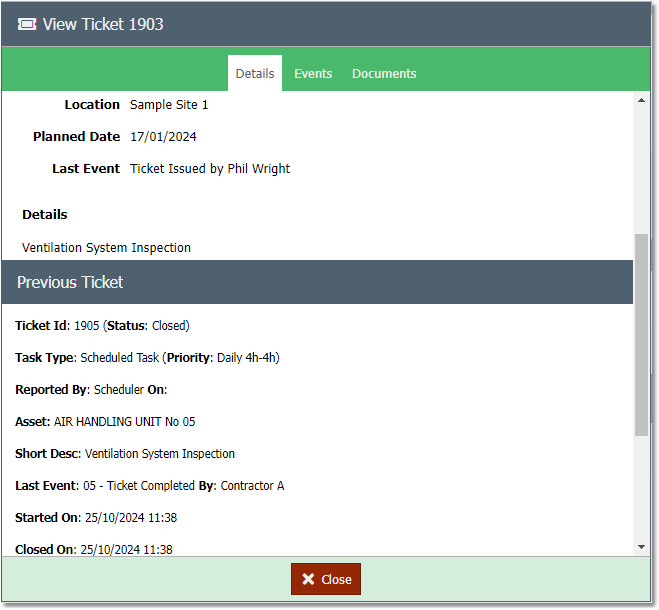
This will display the ticket details window on the screen. Scroll down the view to see the Previous Ticket panel.
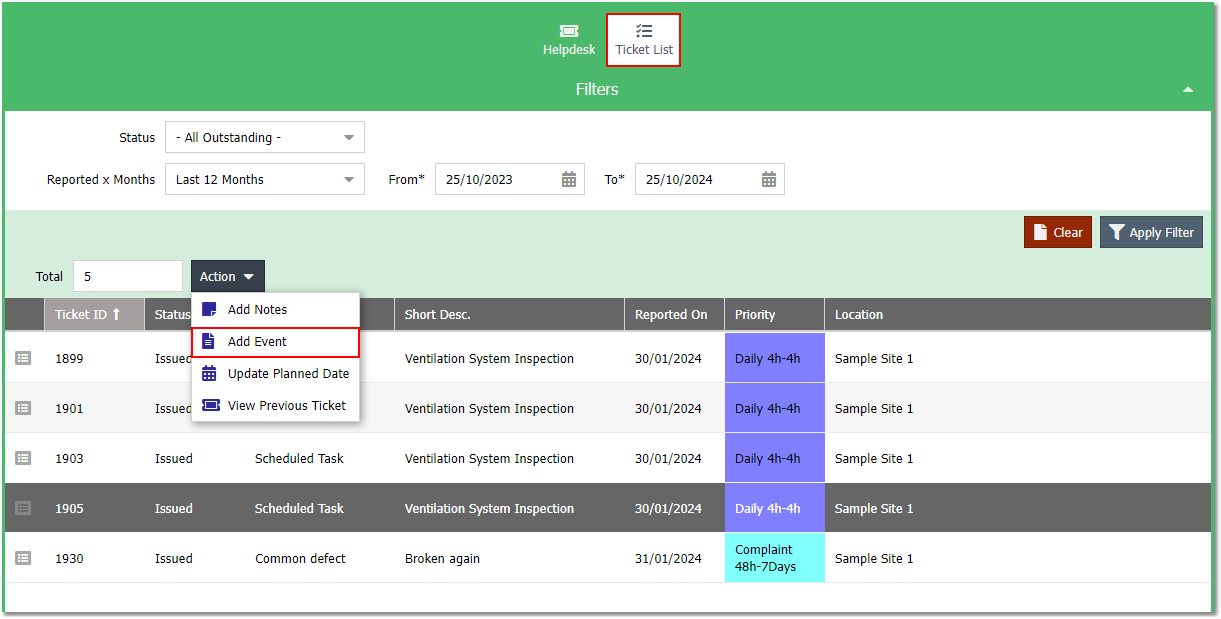
How to process a ticket / add events to a ticket
To process a ticket or add events to a ticket, navigate to the Ticket List view and apply the relevant filters and press the Apply Filter button.
Select the ticket you want to process from the list and press the Action > Add Event button from the toolbar:
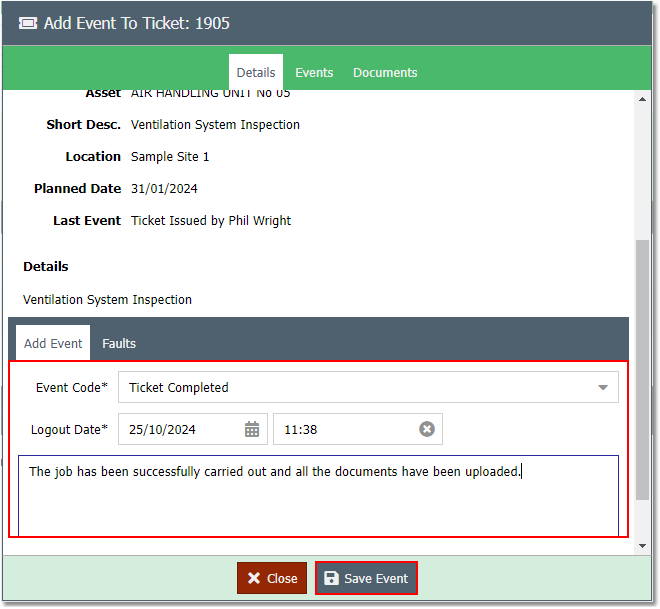
This will display the ticket details window on the screen.
If you want to complete the ticket, then you must upload the relevant documentation (e.g. Contractor Service Sheet) via the Documents tab by following this guide.
Once you have uploaded the document, navigate back to the Details tab and scroll down until you see the Add Event form.
Select an Event Code e.g. On-Hold (to put the task on-hold) or Ticket Completed (to close the task) and populate the Logout Date/Time and Notes then press the Save Event button.
You will get the following confirmation box once the process is complete.
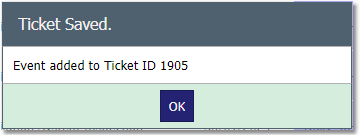
Note, If you added an On-Hold event, the ticket should still show on the Ticket List grid.
However, if selected the Ticket Completed event, the ticket will disappear from the grid unless the Status filter is set to Closed status.