|
This page is about how to create a new stock item record and how to create associated stock stores. We will also show you how to manage your stock items through the creation of transactions. |

•Generating the stock item QR code
•Creating a transaction from the Stock Details view
•Creating transactions for multiple items
•Issue or Return items directly to/from a ticket
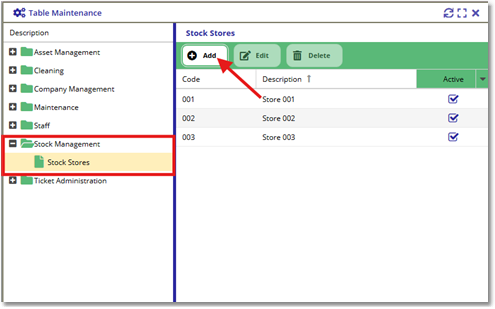
To create a new store, go to Maintenance > Table Maintenance.
Expand Stock Management from the Table Maintenance view and select the Stock Stores field.
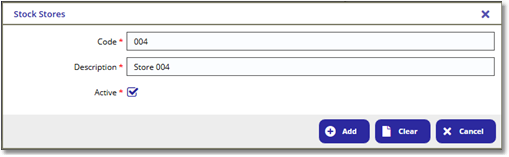
Click on the [ Add ] button to display the form. Populate the required fields marked with a red asterisk* and press the [ Add ] button above the form to save the new store.
Once the record is created, it will appear in the Table Maintenance list and in the Store Id selection field from the Stock Details / List view.
To create a new stock item, go to Stock Management> Stock Details.
On the Details form, fill in the required fields marked with a red asterisk*, the rest of the fields are optional. Then press the [ Save ] button to create the stock item record.
Note:
It is important to note that some optional fields e.g. Level and Allocated, can only be directly set when creating a stock item.
Once the item has been created, these values can only be altered by logging a transaction against the stock item.
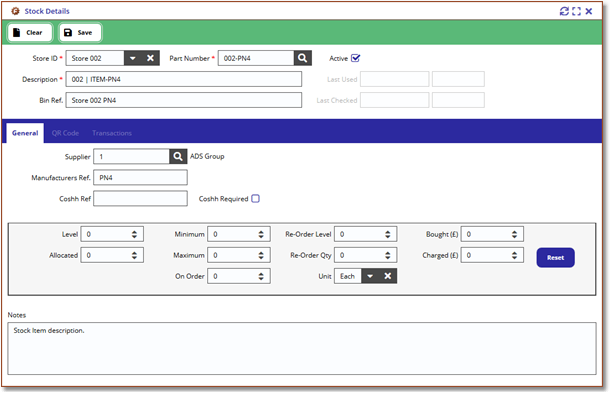
Once the stock item record has been created, the other tabs in the view will activate.
Generating the stock item QR code
To generate a QR Code for stock, first you need to configure the QR Code settings via Maintenance > Advanced Options > QR Code Fields > Stock Details.
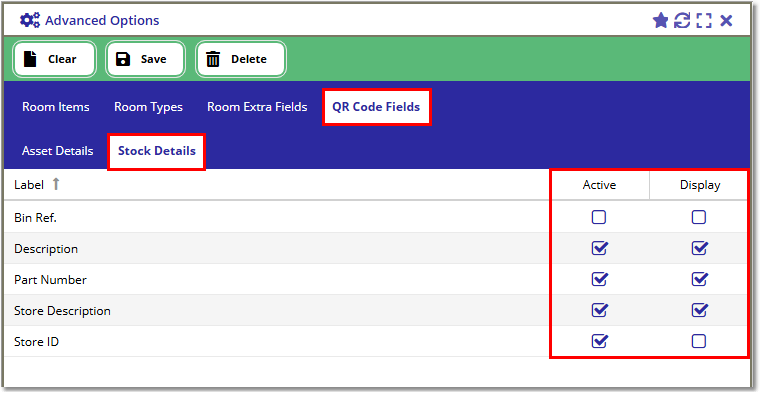
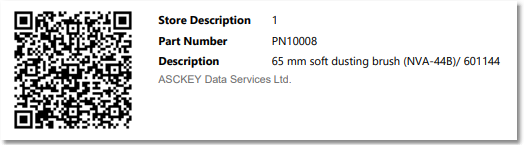
Tick the Active column for the fields you want to include in the stock information when you scan the QR Code and tick the Display column for the QR Code label e.g.:
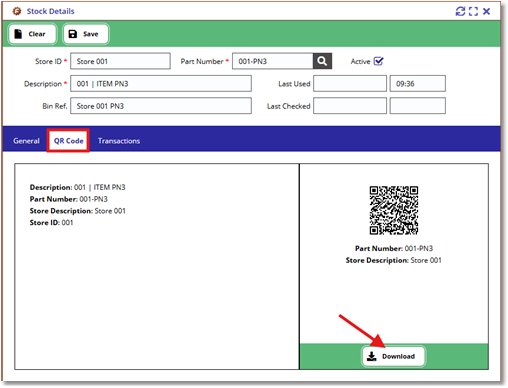
Each stock has a corresponding QR Code, which can be downloaded from Stock Management / Stock Details or from Stock List.
In Stock Details, select the required Part Number and navigate to the QR Code tab. From there you will be able to download the QR code.
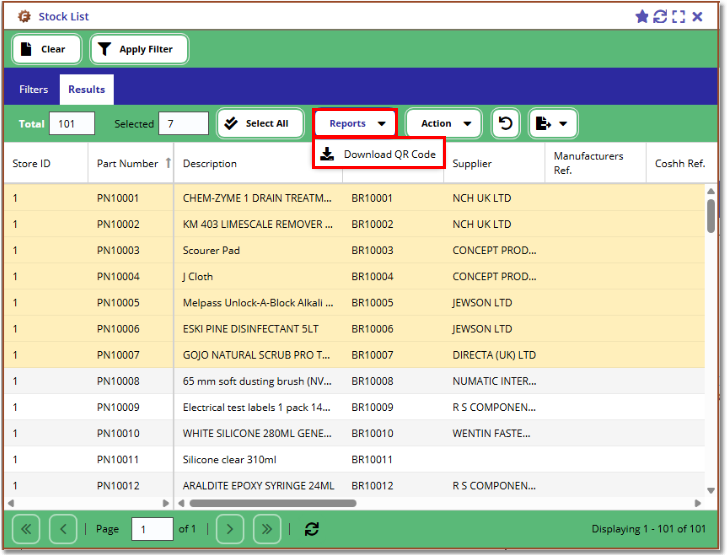
In Stock List you can download one or more QR codes by selecting items on the list and clicking Reports > Download QR Code. The results will export as a PDF file.
Note, you can apply filters in the Filters form to limit the search results and use the [ Select All ] button to download the QR code for the entire list.
Creating a transaction from the Stock Details view
To create a single transaction, go to the Stock Management > Stock Details view and select a stock item.
This can be done by selecting a Part Number from the lookup. Then go to the Transactions tab.
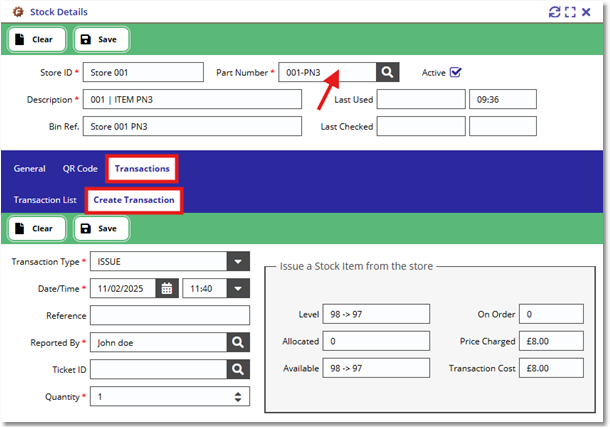
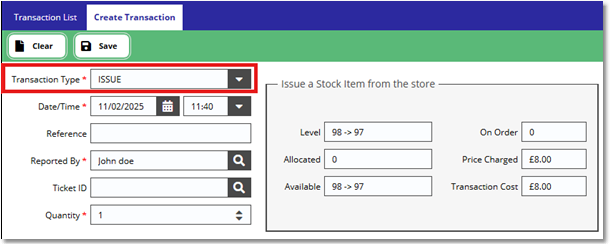
On the Create Transaction tab, select the desired transaction type:
Transaction Status:
ISSUE |
Issue a stock item to a ticket. Note, you cannot issue more than the available stock. |
RETURN |
Return a stock item from a ticket when it is no longer required. Note, you cannot return more than the allocated stock in the ticket. |
RECEIPT |
Record delivery of a stock item. |
CHECK |
Carry out a check of stock quantity. This will correct the stock level if a discrepancy exists. |
TRANSFER |
Transfer a quantity of stock to a different store. |
The fields on the right-hand side will give an indication on stock availability and whether there is sufficient stock available to carry out the current transaction.
To complete the transaction, press [ Save ]. If the transaction saved successfully, a record of this should now be visible in the Transaction List.

Creating transactions for multiple items
Some transactions can be carried out for multiple items at a time.
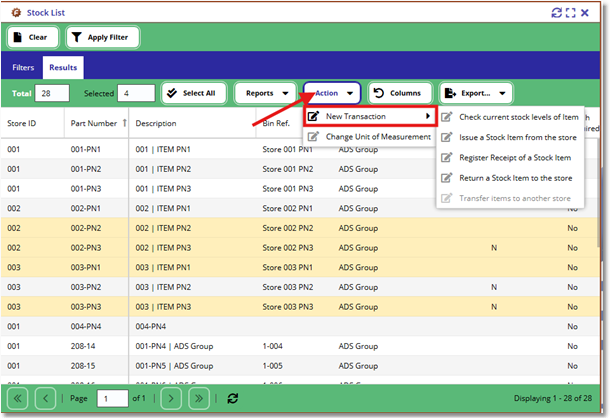
For this you’ll need to select the required items from the Stock Management > Stock List view.
Load stock items in the list by pressing the [ Apply Filter ] button, note you can apply filters by filling in the form before pressing the button to limit the results.
When viewing items on the list, go to Actions > New Transaction, choose your transaction type.
The selected items will now appear in grid format. Here, you can specify the quantity for each item.

If an item has been selected by mistake, this can be removed from the list by clicking the [ Cancel ] button on the associated item row.
Clicking [ Save ] will attempt to create a record for each transaction. If all transactions have been successfully created, the form will close.
If the transactions have been unsuccessful, these records will remain on the form in case an adjustment to quantity is required.
Issue or Return items directly to/from a ticket
Instead of selecting a ticket when creating an ISSUE or RETURN transaction, it is also possible to create the transaction directly from the Task Management > Task Helpdesk view.
Load a ticket record in the view either by typing the ID or selecting the lookup on the Ticket ID field.
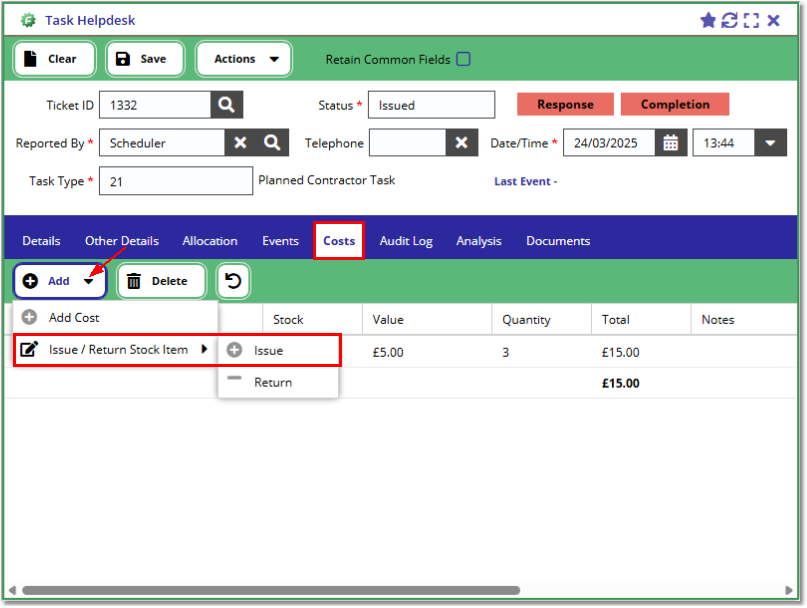
Once the ticket record is loaded on the view, navigate to the Cost tab. Here you can see the associated costs for the ticket.
To issue a stock item to the ticket, click [ Add ] and select Issue / Return Stock Item > Issue.
On opening of the Transaction Form, you will have to select the specific stock part number to issue.
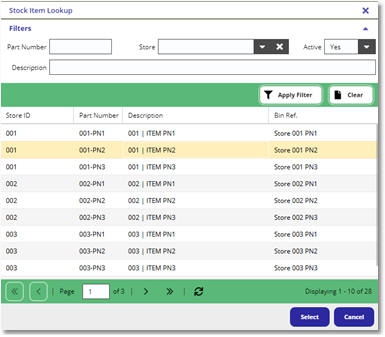
Once a stock item has been selected, the process is the same as before with the exception that you can include further information relating to this transaction below the form.
Press [ Save ] to Issue the item to the ticket. A new record will appear in the cost tab.