|
This page will be all about creating a new company record and how to set the company type and create new contacts. We will also show you how to create a new contractor, how to give the contractor access to the fmfirst-cloud portal, and how to create new contracts. |
•Creating a new company & setting up the company type (e.g. Contractor, Supplier, Manufacturer, etc.)
•Creating new contacts and rates
•For Contractors Only: Grant access to the fmfirst® Cloud portal
•For Contractors Only: Creating new contracts
Creating a new company & setting up the company type (e.g. Contractor, Supplier, Manufacturer, etc.)
To create a new company record, go to Company Management > Company and Contacts.
Populate the Name field and navigate to the Details tab and fill in all of the required fields marked with a red asterisk*, the rest of the fields are optional.
Then click the [Save] button on top of the form:
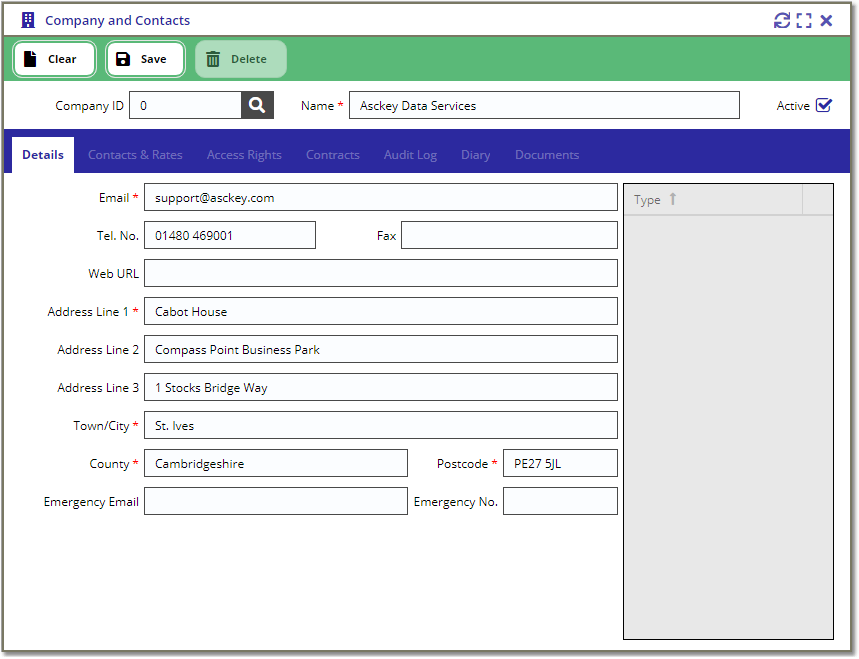
Once saved, the system will generate a new Company ID. This will be a unique ID throughout the system.
The Type grid will also get activated once the company record is created. The default available types are: Authoriser, Contractor, Manufacturer, Owner, Service Provider, and Supplier.
Select the relevant company types from the grid by ticking the box as shown below:
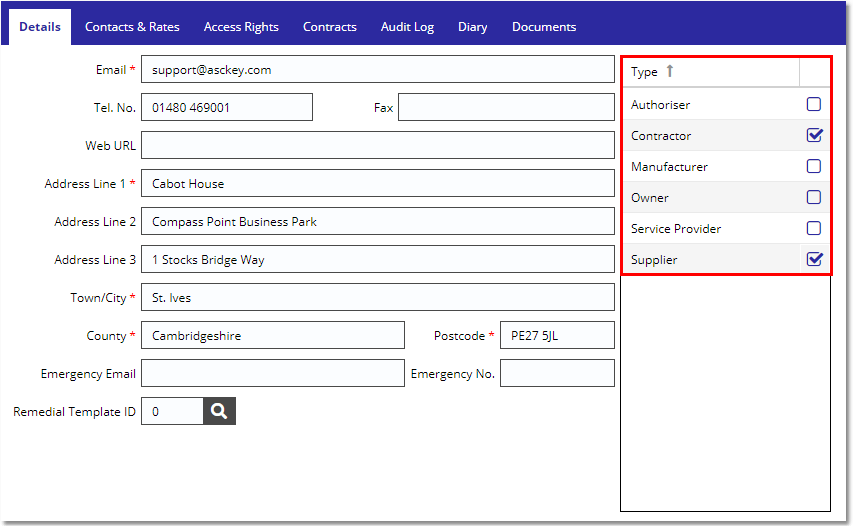
Please note, the company types are linked to some of the lookup fields in the application.
For example, the Supplier field from the Asset Details view, will launch the Company Lookup filtered by the Supplier type.
Creating new contacts and rates
To set up the company contacts & rates, go to Company Management > Company and Contacts.
Load the company record in the view and navigate to the Contacts & Rates tab.
Creating a new contact:
To create a new contact, navigate to the Add/Edit Contact tab and fill in all of the required fields marked with a red asterisk*, the rest of the fields are optional.
Then click the [Save] button on top of the Contact form:
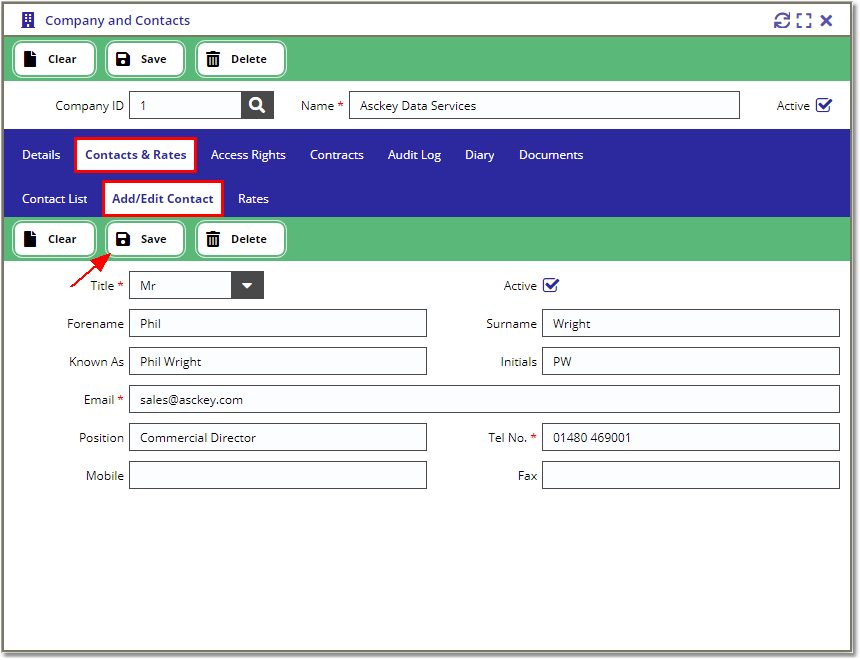
You can add multiple contacts to a company record by pressing the Clear button and repeating the steps above.
Creating new rates:
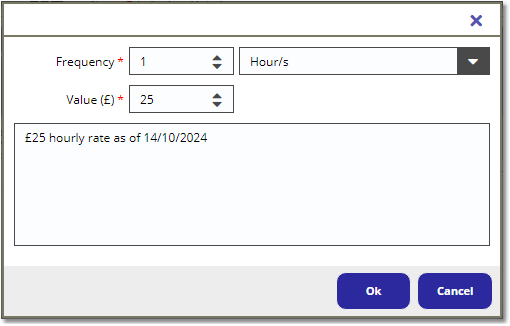
To create a new company rate, navigate to the Rates tab and press the Add button.
Fill in all of the required fields marked with a red asterisk*, the rest of the fields are optional. Then press the [Save] button to create the new rate.

For Contractors Only: Grant access to the fmfirst® Cloud portal
You can grant the contractors access to the fmfirst® Cloud portal or the tasking mobile application.
Go to Company Management > Company and Contacts and find the contractor from the Company ID Lookup then load their record in the view.
Navigate to the Access Rights tab and populate the Login Name field. Note, the login name must be unique throughout the system as this will be used for access, you can use the contractor's email address if you prefer.
Then press the [Save] button to generate their login account.
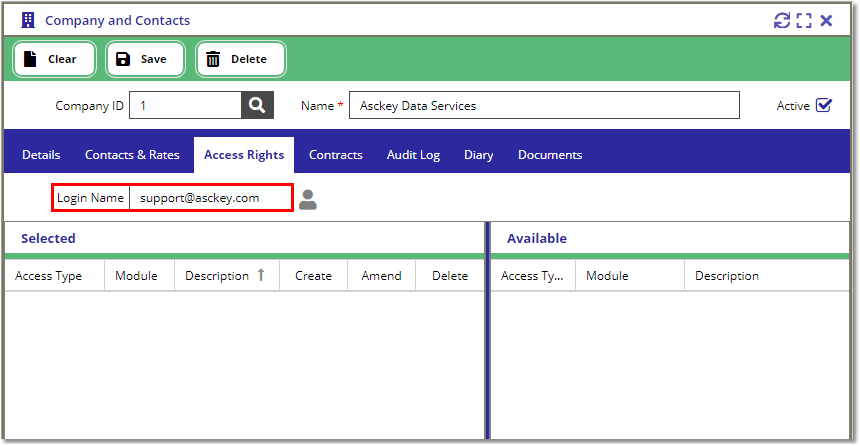
This will then display the available permissions/security tokens on the Available grid. Drag & drop the relevant security tokens that you want to grant to the contractor account:
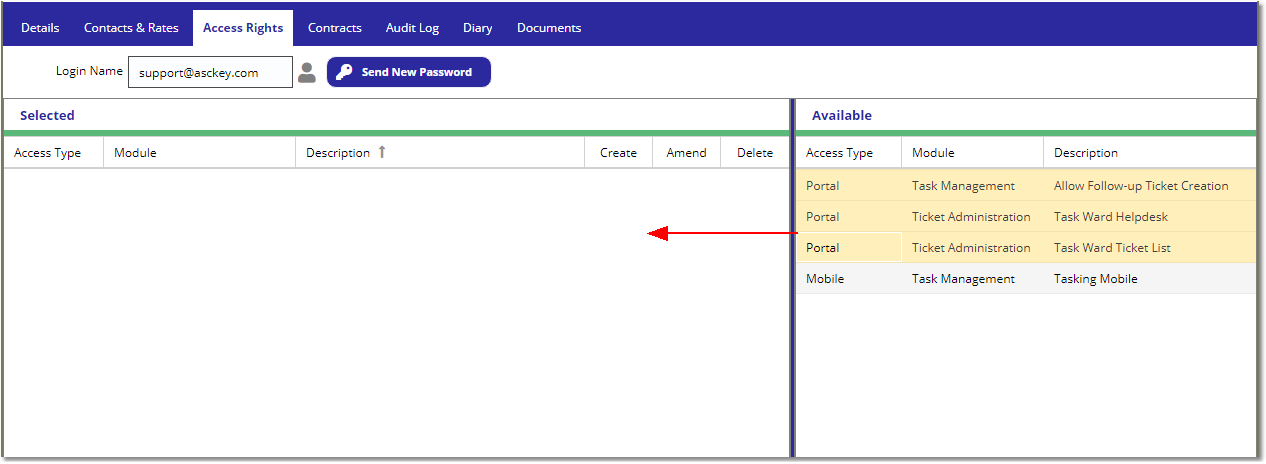
Note: If the contractor only needs to upload documents and close the ticket, then you can give them access to the Portal app.
If they need to log a Work-In-Progress event on a ticket and answer the Health & Safety checklist and Asset Element questions, then you must give them access to the Tasking Mobile app.
The contractor will need to register a device token to login to the mobile app, therefore will consume 1 mobile license.
For Contractors Only: Creating new contracts
To create a new contract, go to Company Management > Company and Contacts and find the contractor from the Company ID Lookup then load their record in the view.
Navigate to the Contracts tab and open the Details form. Fill in all of the required fields marked with a red asterisk*, the rest of the fields are optional.
Then press the [Save] button from within the Details tab to create the new contract.
Note:
You can add more options to the contract Type and Category fields via Table Maintenance > Company Management > Contract Type / Contract Category.
To allow the admins to allocate tasks to a contract via the Helpdesk and/or Ticket List view, then ticket the Helpdesk box.
To allow the admins to allocate schedules to a contract, then tick the Schedule box.
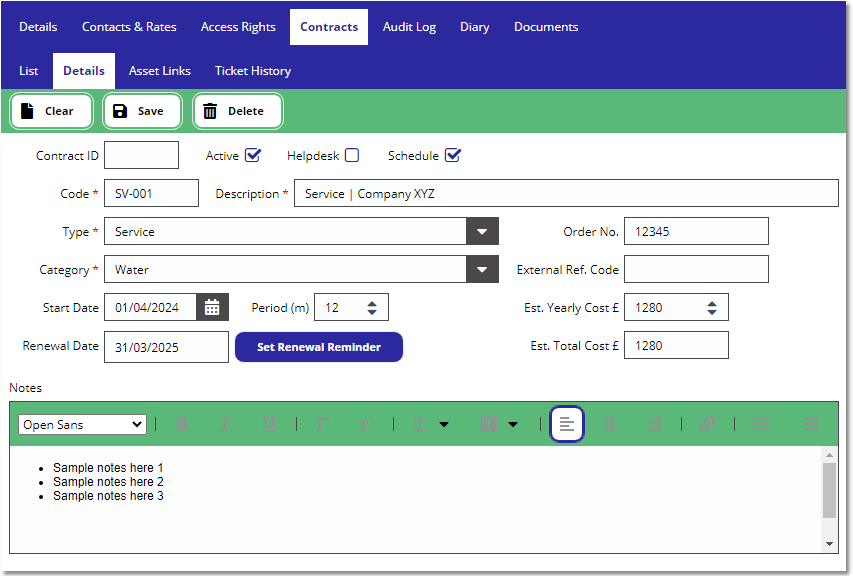
Once the contract is created, it will generate new Contract ID and it will appear in the List tab.

Note, you can edit a contract by selecting it from the List tab. This will load the contract in the Details tab and you can apply the changes in the form.
If you need to add another contract, press the Clear button to reset the form, then repeat the steps above.
